To import your data into QuickBooks from Lead Commerce, we recommend a product called Transaction Pro Importer. Transaction Pro Importer allows for easy import from Lead Commerce into QuickBooks of all versions and platforms for transactions and lists using a simple CSV file. To get the files you need for Transaction Pro, please contact your sales representative on getting integration into Transaction Pro that is customized for your business.
Typical configuration settings for your Quickbooks integration will consist of four (4) file types; Sales Order CSV, Payment CSV, Purchase Order CSV and an Item Receipt CSV. These files are delivered based on whatever frequency you request with your support team and are usually determined during the on boarding process. Most customers opt for either a daily or weekly data set to be emailed to them.
To get Transaction Pro Importer, click here.
To watch Transaction Pro in action, click here.
Note: Be sure to purchase the online, desktop or server edition of Transaction Pro that fits the type of Quickbooks you are using. The version of Quickbooks such as premier does not matter as Transaction Pro Importer works with all versions.
Tutorial on Using Transaction Pro Importer:
To use Transaction Pro with Lead Commerce, you need to complete the following steps (Instructions written for Desktop Version):
- Download and purchase your copy of Transaction Pro Importer. You must have QuickBooks already installed to use Transaction Pro. Do not open Transaction Pro yet.
- Open QuickBooks.
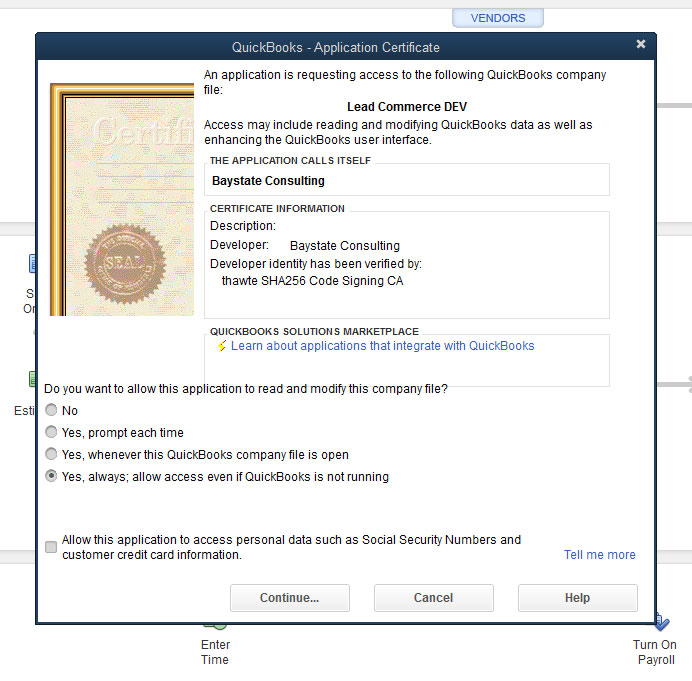
- Open Transaction Pro Importer. You will be prompted about an Application Certificate. Select "Yes, always; allow access even if QuickBooks is not running", then click "Continue", then "Done".

- Proceed to the Importer, Select your file source as "File"
- Browse to the CSV provided by Lead Commerce.
- Select your delimiter as "Comma" and Record "CR/LF".
- Select your Import Type, for this demo, we will select Sales Order.

- Note: These additional options are available for importing by clicking the Options button next to Program Options.

- Go through the wizard for importing your files by clicking next. Transaction Pro Importer should map the columns appropriately as provided by Lead Commerce.
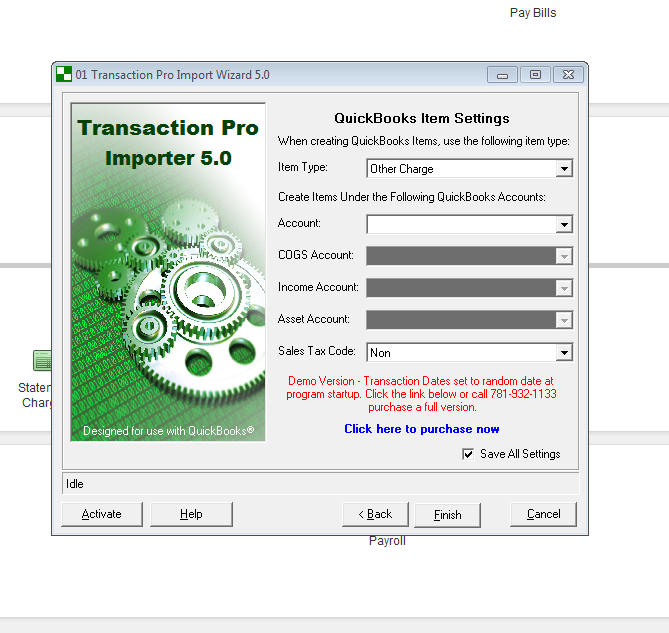
- On last screen, you have the ability to select your Item Type, Account, COGS Account, Income Account and more for mapping. Please select the appropriate settings for your import and click finish.

- Upon Completion, you will see a completed import message.

If you have any questions about Transaction Pro, please contact their support at [email protected] or visit their YouTube Channel.
COMMON SETUP QUESTIONS AND RESOURCES:

 Made with ❤ in the USA.
