If your deployment of Lead Commerce is running on a custom domain and you wish to enable SSL, the following steps outline the first steps in the process of setting it up:
Step 1: Create a FREE CloudFlare Account
- - Click here to access the CloudFlare sign-up page.
- - Fill out the form and follow the instructions.
Step 2: Link your Site to your CloudFlare Account
- - After you login, you will see the option to add a site
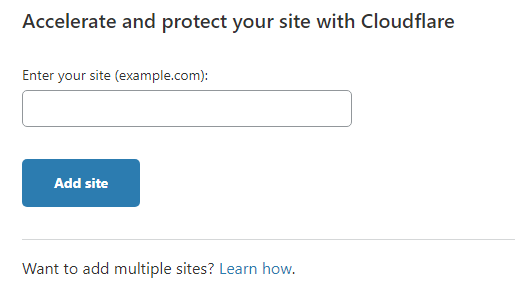
- Enter your site and click the "Add Site" button
- - Note that this could take a few moments before it proceeds to the next screen.
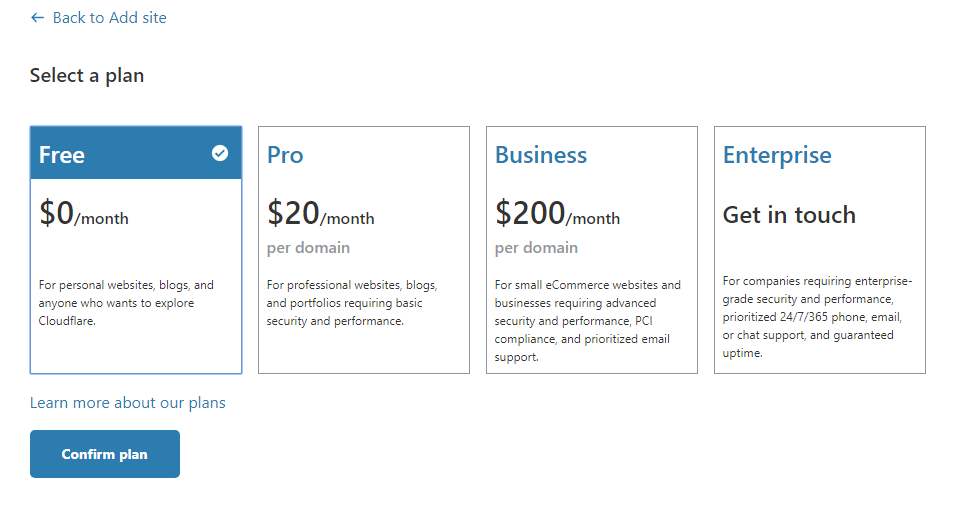
Step 3: Select a Plan
- - CloudFlare offers additional services and you may want to select a different plan later; however, for the purposed of Lead Commerce SSL, you only need a FREE Plan.
- Select the "Free" plan and "Confirm Plan"
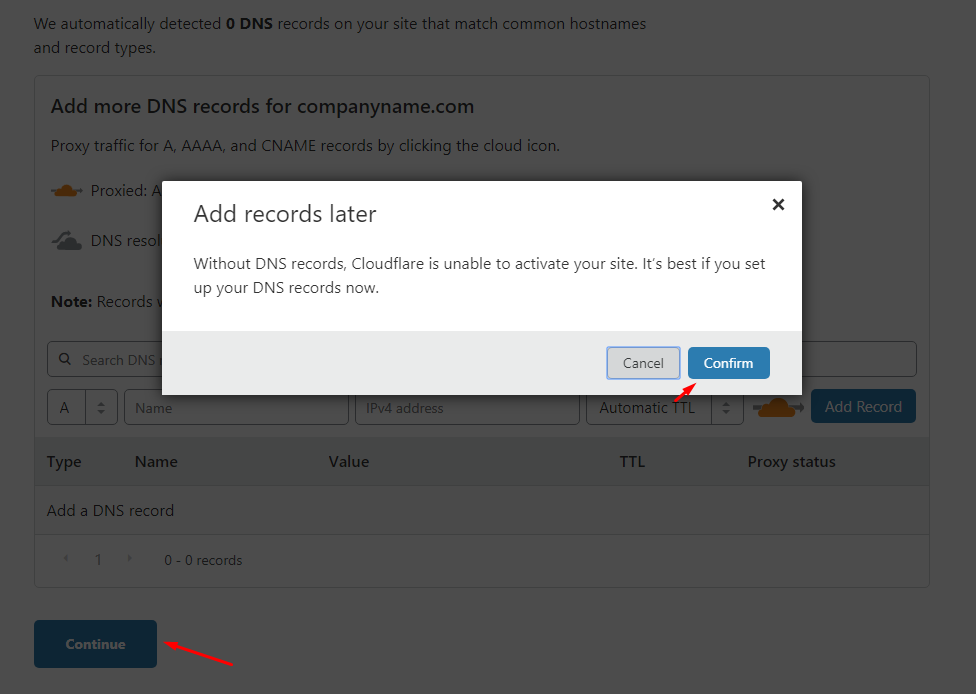
Step 4: Finish Adding the Site
- - The setup process may say there are no DNS records. That is OK.
- Click "Continue"
- On the popup, click "Confirm" to Add DNS records later.
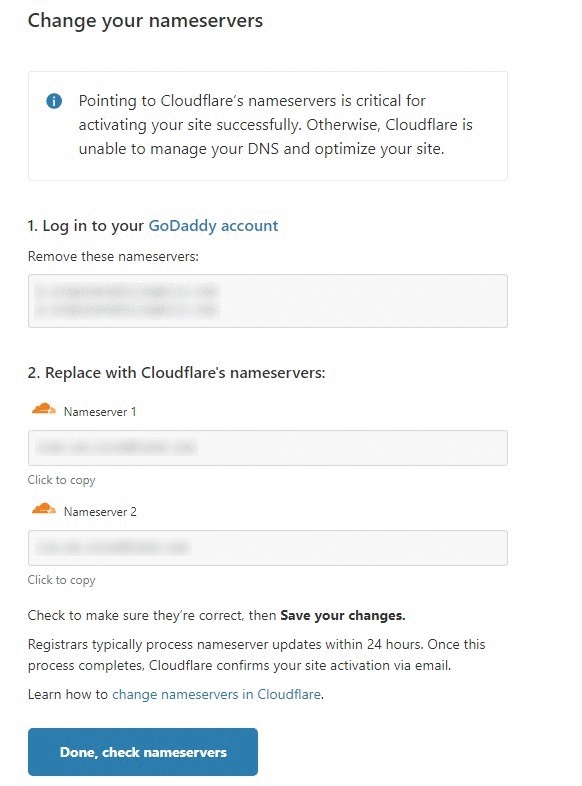
Step 5: Continue Setting up the DNS
- - You will be provided instructions for how to update your DNS records with your registrar.
- Complete those steps and then come back to CloudFlare once finished.
The initial setup is now complete.
NOTE: You still need to take additional steps to fully configure your domain.
For configuring the DNS and enabling SSL, see "Managing DNS and SSL with CloudFlare"

 Made with ❤ in the USA.
