In this article we will be managing the DNS and enabling the SSL using your CloudFlare account. If you do not have an account, please follow the steps of "Creating a CloudFlare Account for SSL"
If you have just recently created your CloudFlare account and changed the DNS records at the registrar, you may need to wait for the information to be updated on CloudFlare.
Step 1: Pointing the Domain
Once you are logged into your CloudFlare account, navigate to the site you want to manage and click on the DNS settings. If the DNS has been setup correctly, you will have a screen similar to the one below. If not, you will need to follow the instructions for changing your DNS records with your domain's registrar.
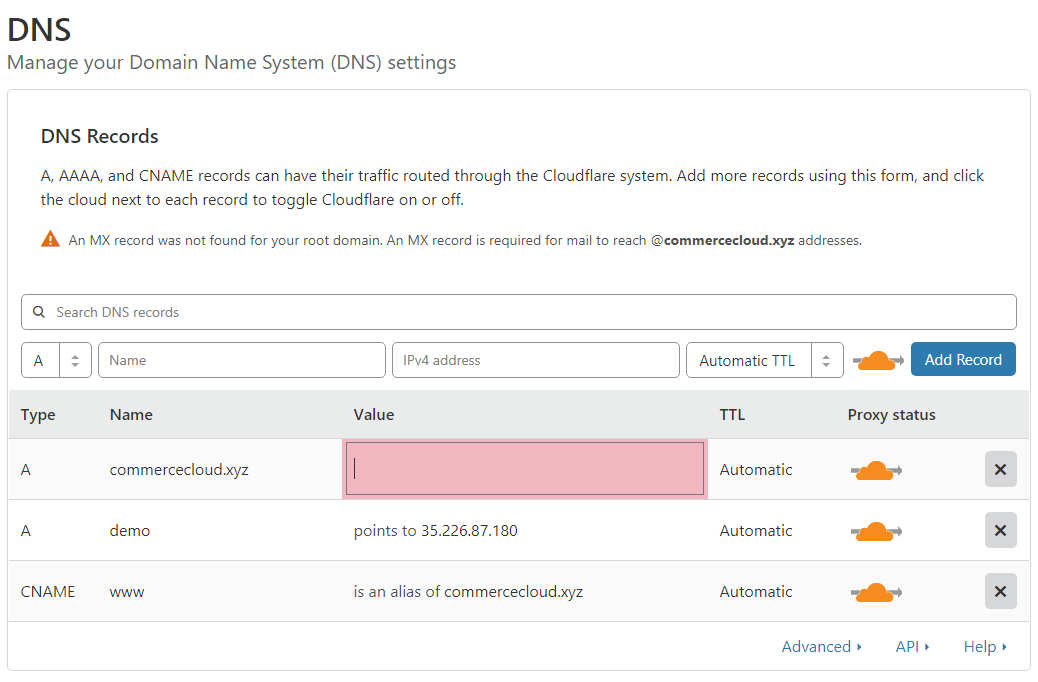
You will be provided a IP Address by Lead Commerce and you will insert that in "Value" field for the A record on the domain. If your site is running on a subdomain, such as "demo.commercecloud.xyz" you would be updating the value for the "demo" A record instead.
Press enter or click out of the box when complete.
Please Note: There is a possibility the after changing your IP address, it will revert back to the old address. If that occurs, you will need to turn off the proxy for the A record, then make the update, and then turn the proxy back on.
Step 2: Enabling SSL
Navigate to the "Crypto" section
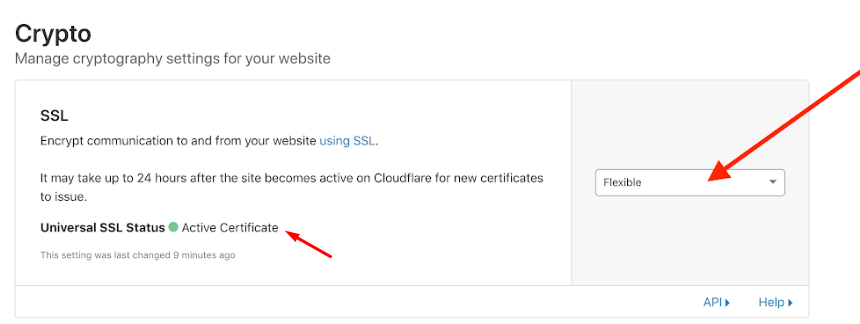
FIRST - Verify that the certificate type is set to "Flexible" as shown.
NEXT - Verify that the certificate is active.
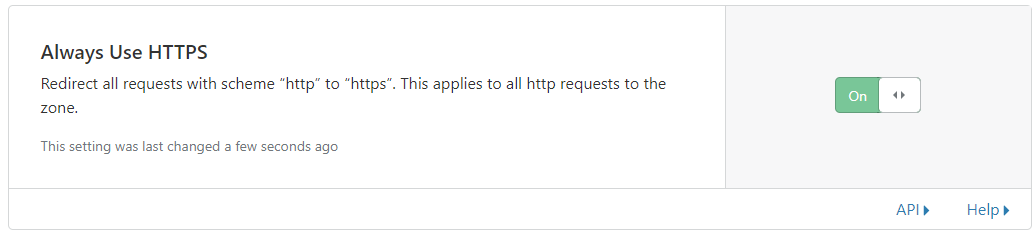
AFTER you have confirmed that the certificate is flexible and active, scroll down and Turn On "Always Use HTTPS"
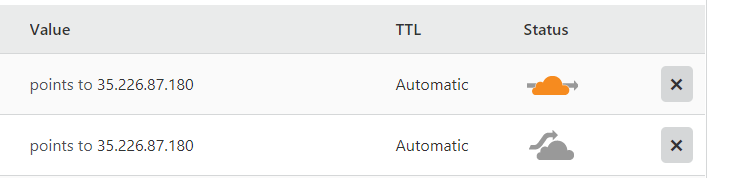
Back on the DNS settings tab, ensure that the Cloud next to the A record for your domain is Orange or else SSL will not work.

 Made with ❤ in the USA.
