Step 1: Log into your Lead Commerce Back Office
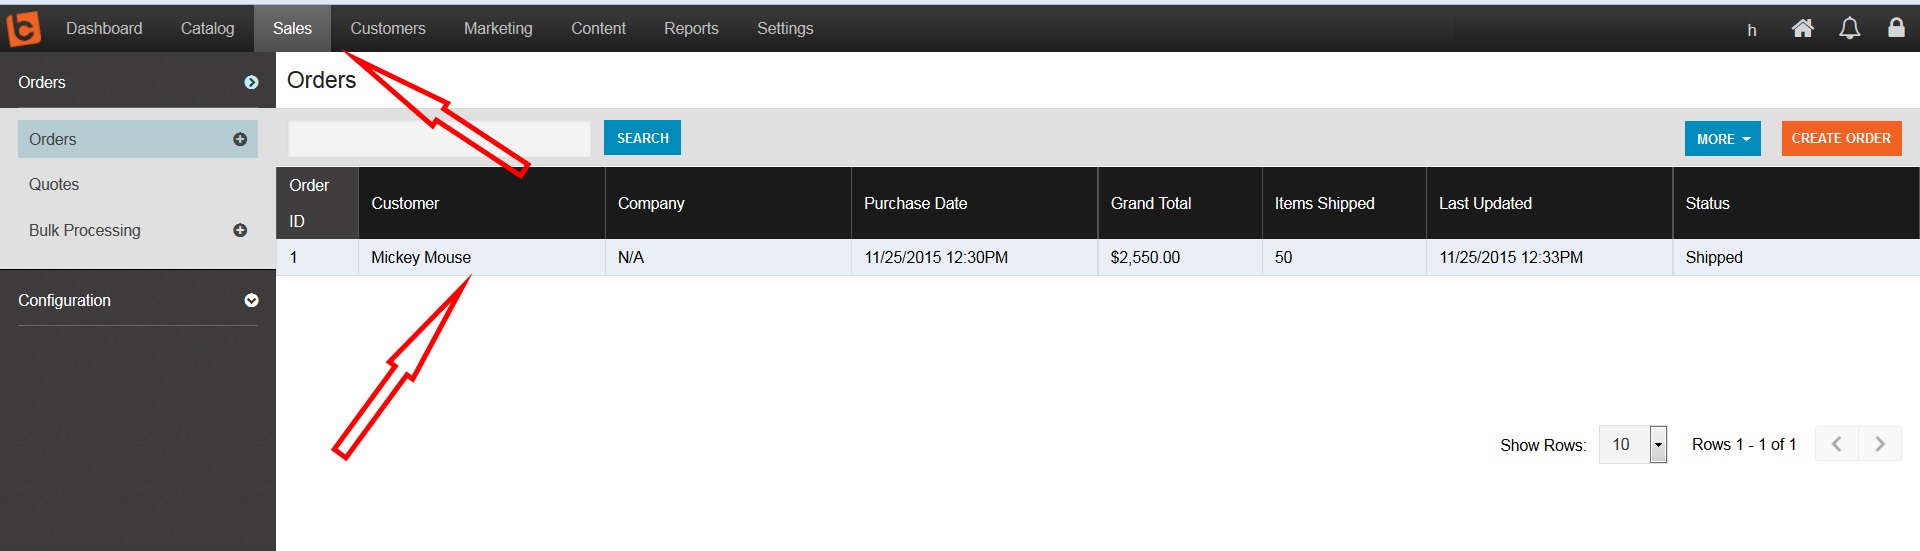
Step 2: Go to your "Sales" module and look for the order to which the RMA is associated with
Step 3: Click on the correct order record
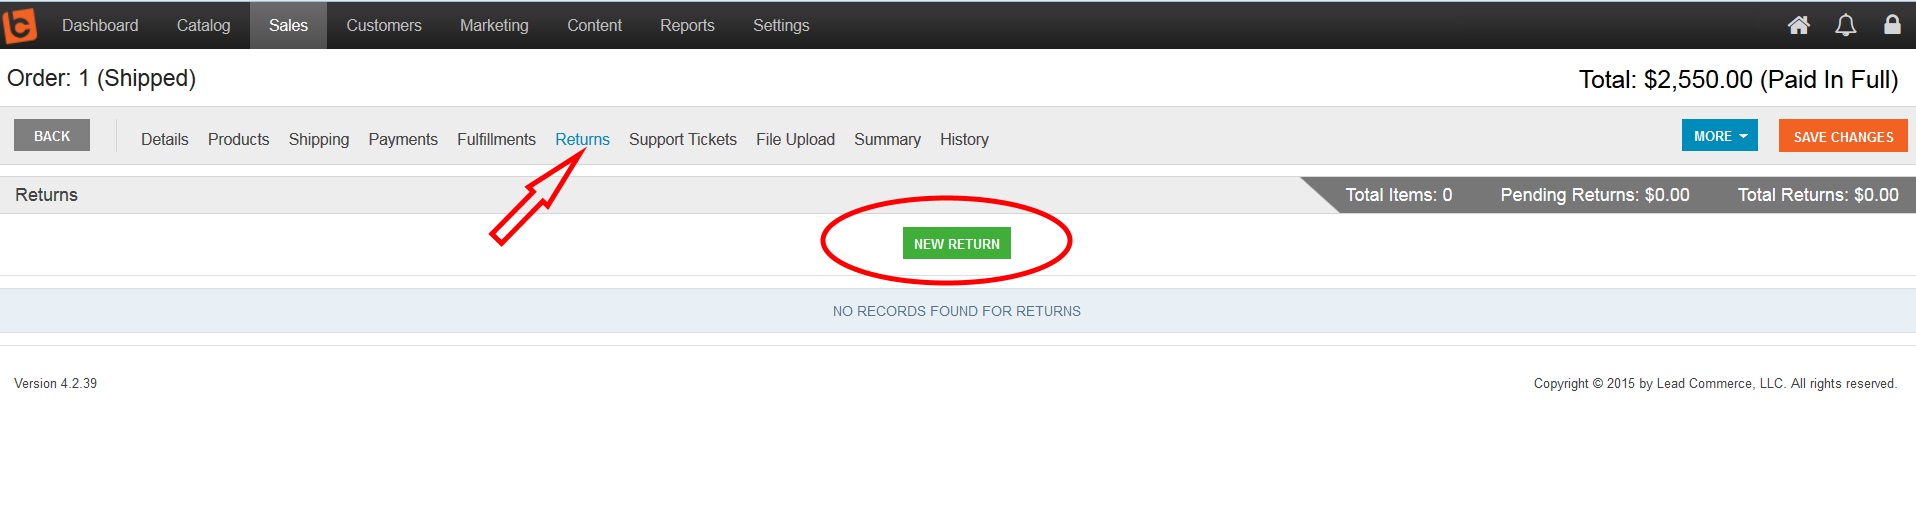
Step 4: Look for the Returns tab and click on the green "New Return" button
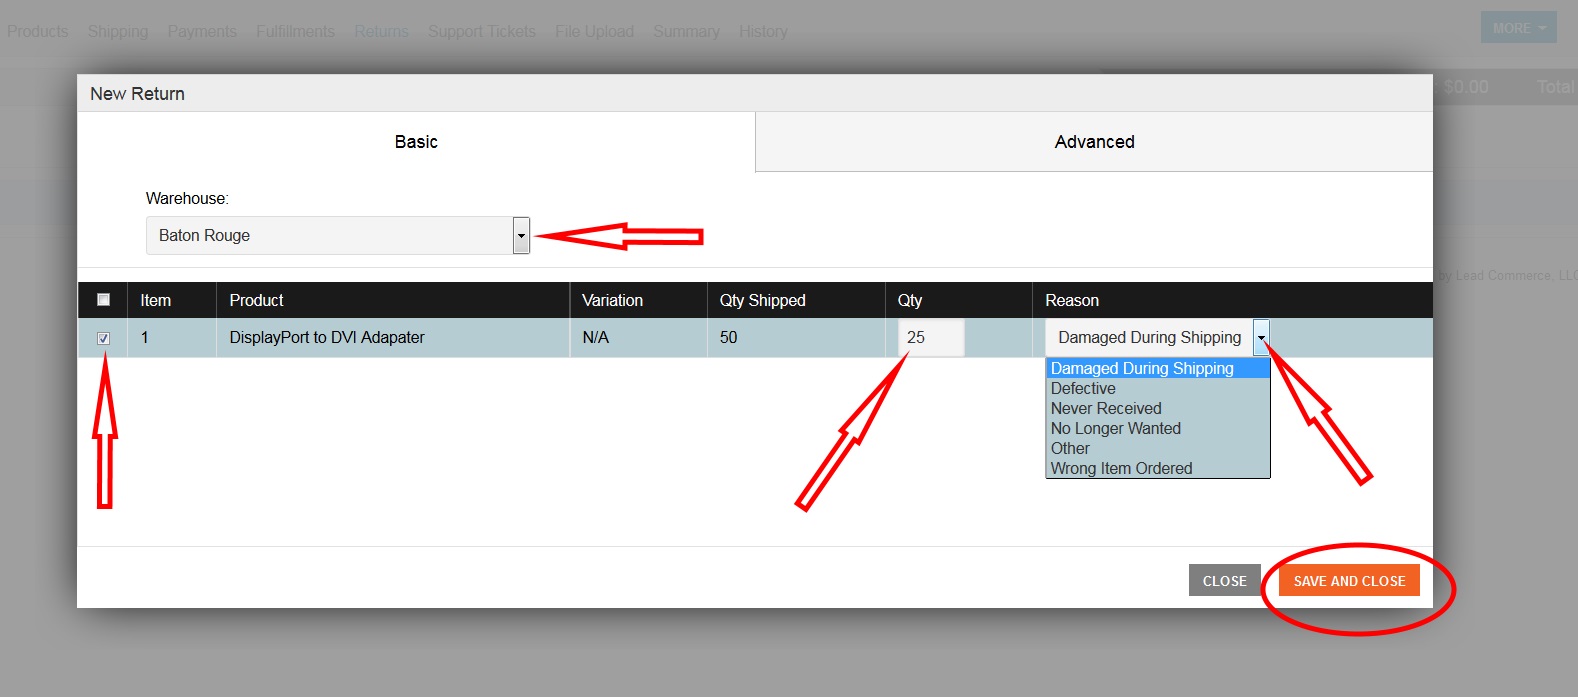
Step 5: Choose the Warehouse that will expect the return
Step 6: Validate the Line item that will be returned
Step 7: Choose the Quantity of the line item that will be returned.
Step 8: Choose the Reason for the return
Step 9: Click the orange "Save and Close" button
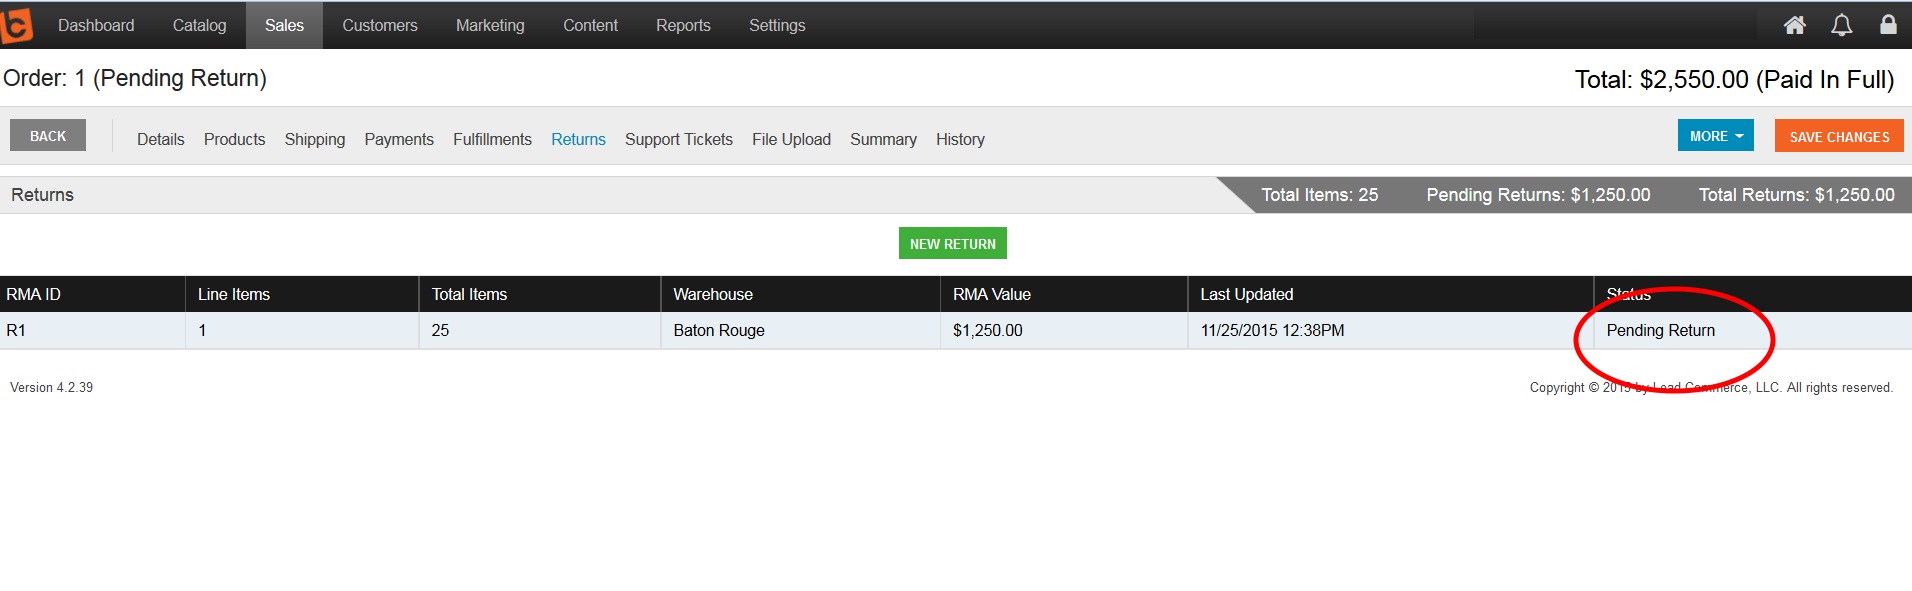
Step 10: Note that the line item has changed to "Pending Return" - Once you have received the item, go to Step 11
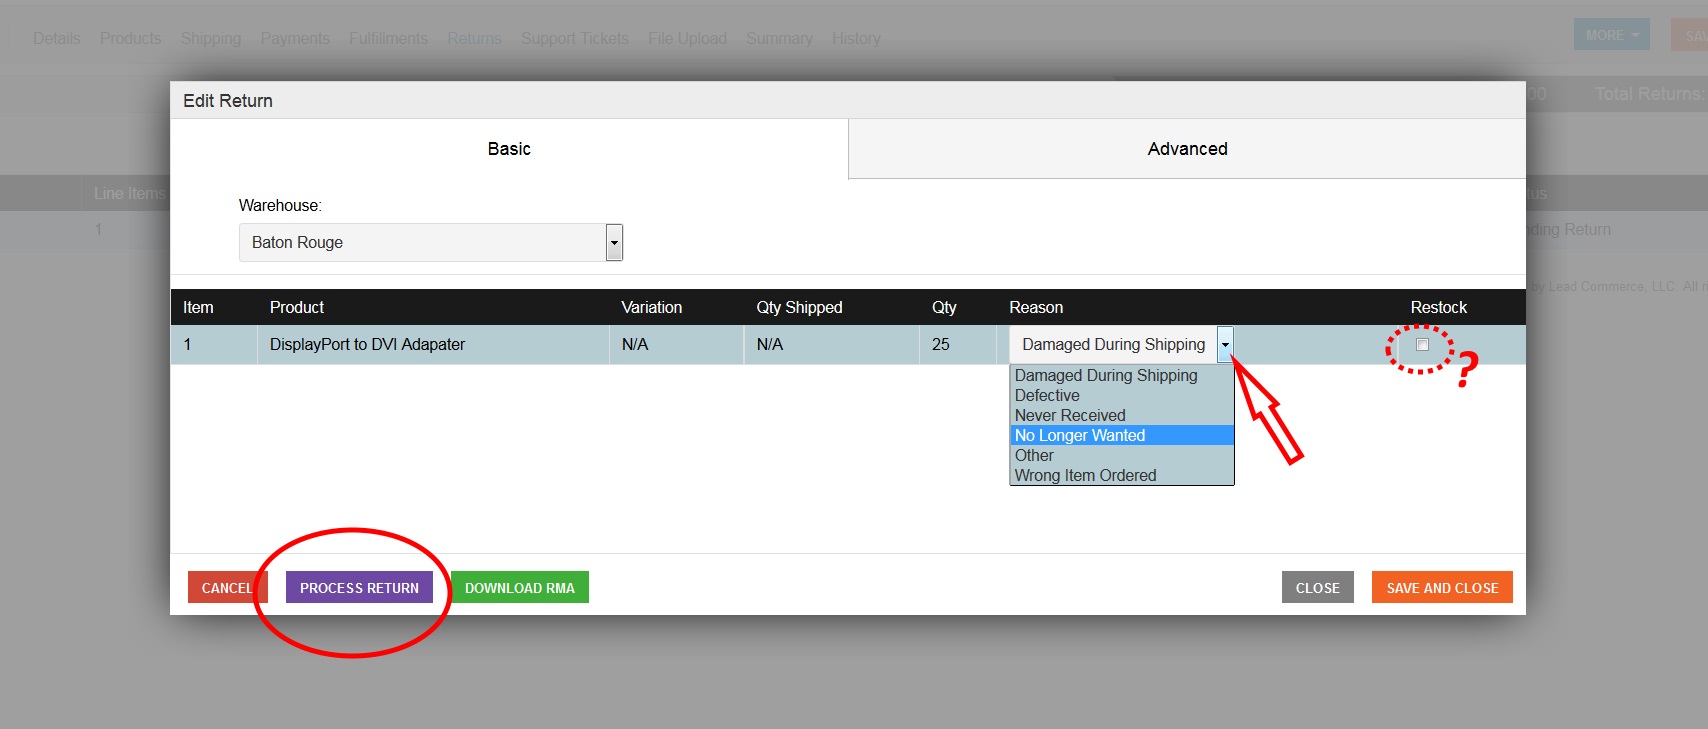
Step 11: Click on the line item again to open up a dialog box
Step 12: Choose the Reason for the return here
Step 13: IF YOU ARE ADDING THE PRODUCT BACK INTO INVENTORY - CHECK THE "RESTOCK BOX"
Step 14: Choose the purple "Process Return" button
Step 15: Note that the line item states "Returned" within the "Returns" tab
Step 16: Note the orange WARNING to issue a refund is displayed.
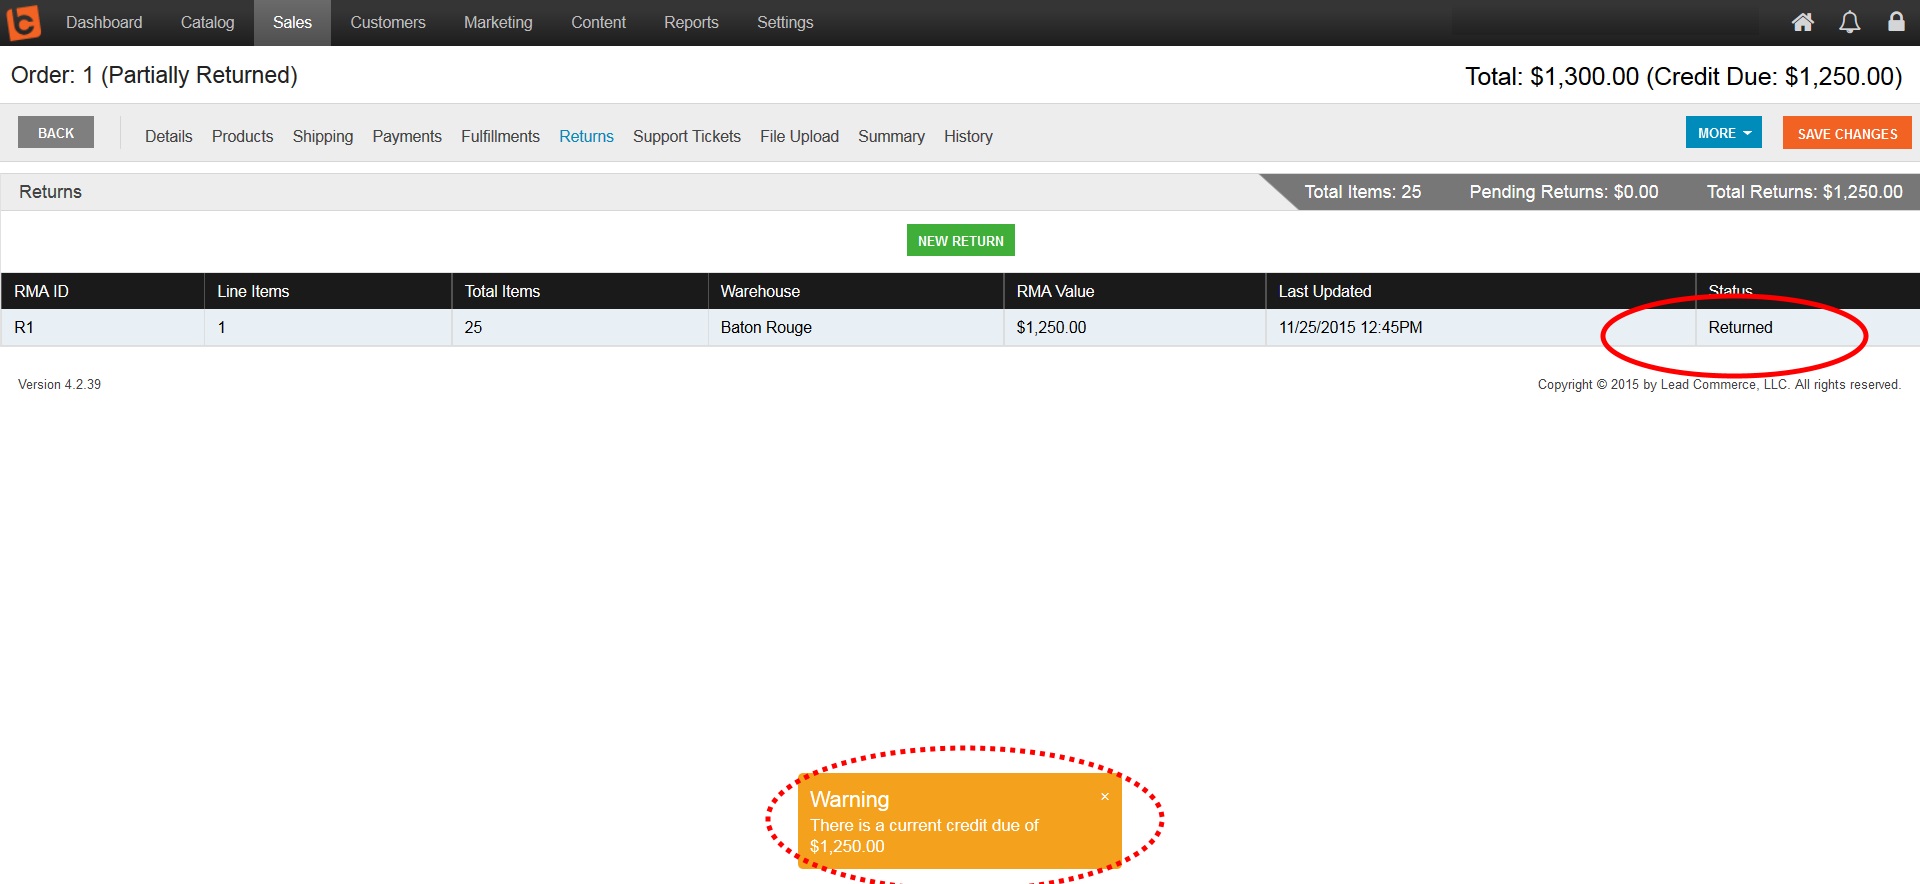
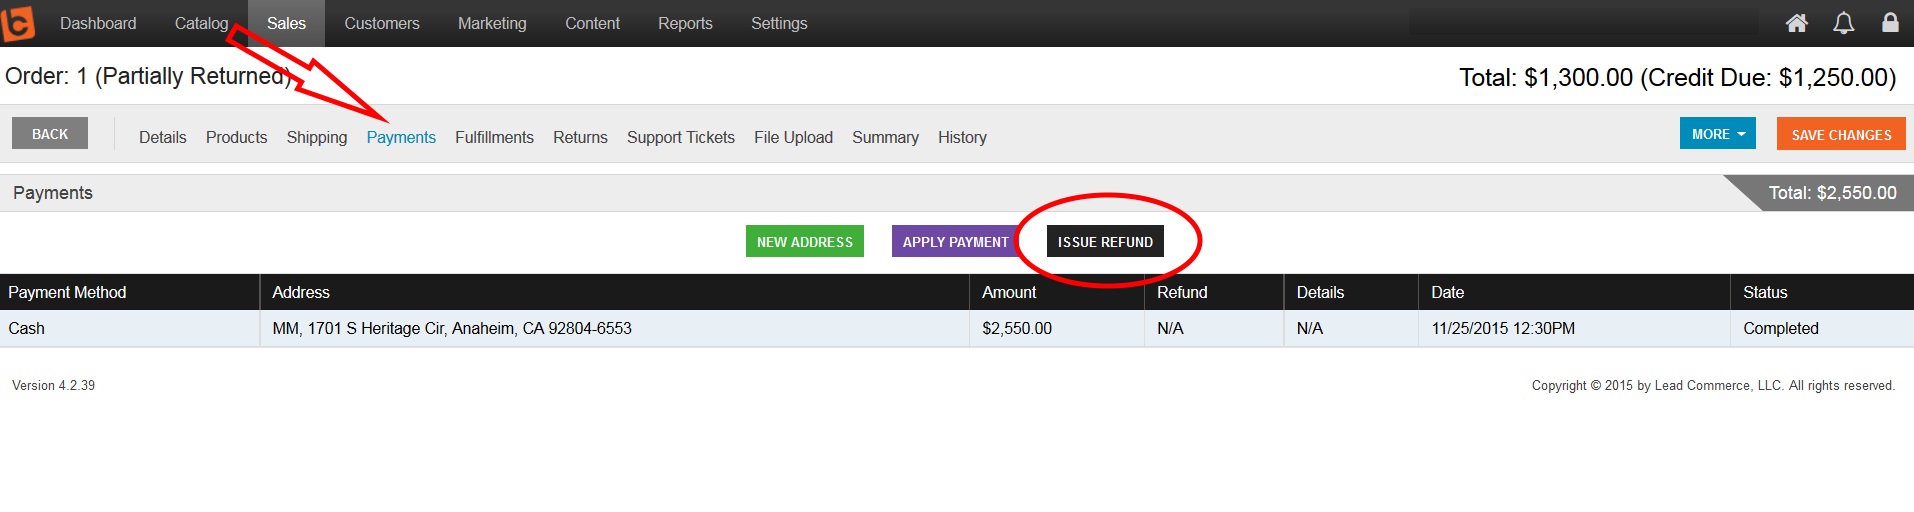
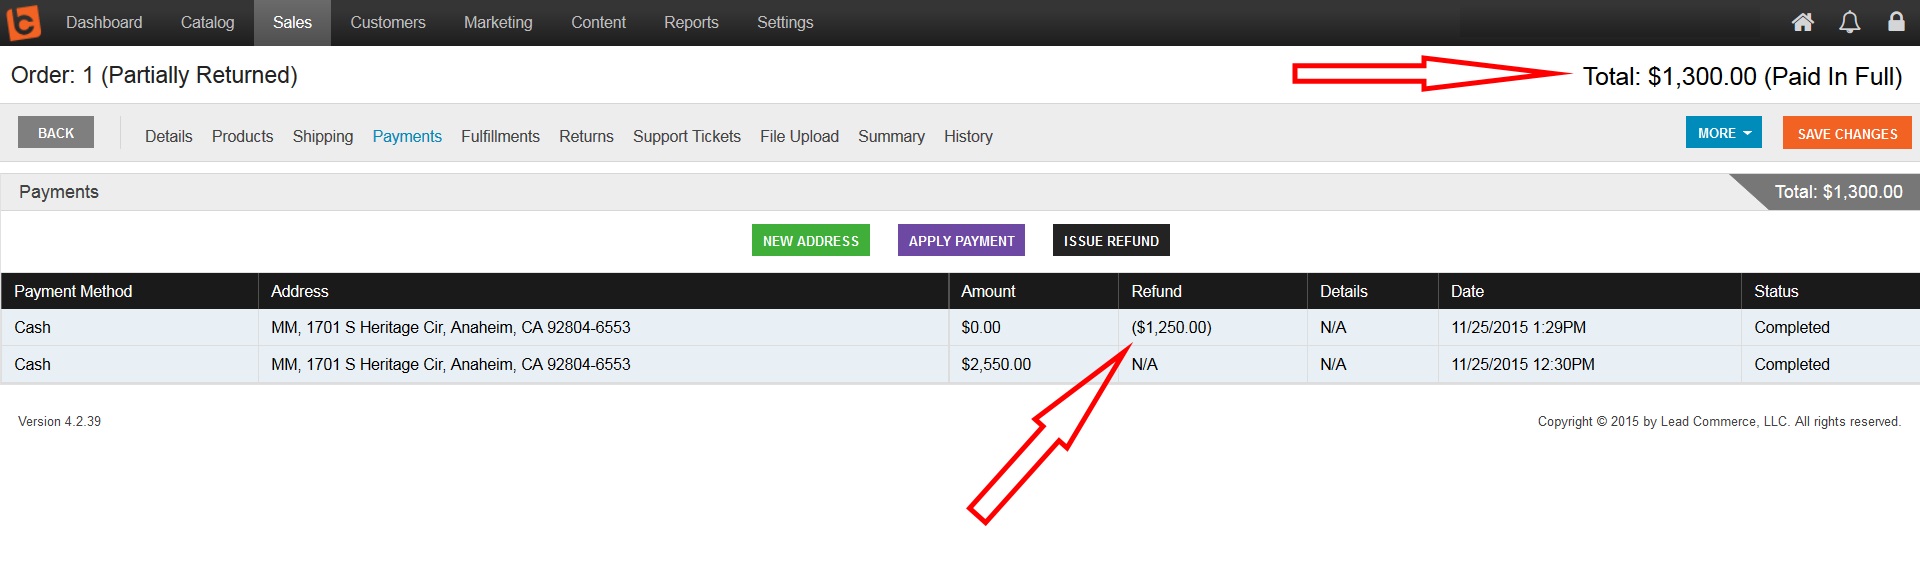
Step 17: To issue a refund go to the "Payments" tab
NOTE: To issue a Refund, you must first CANCEL all active invoices.
Step 18: Click on the black "Issue Refunds" button
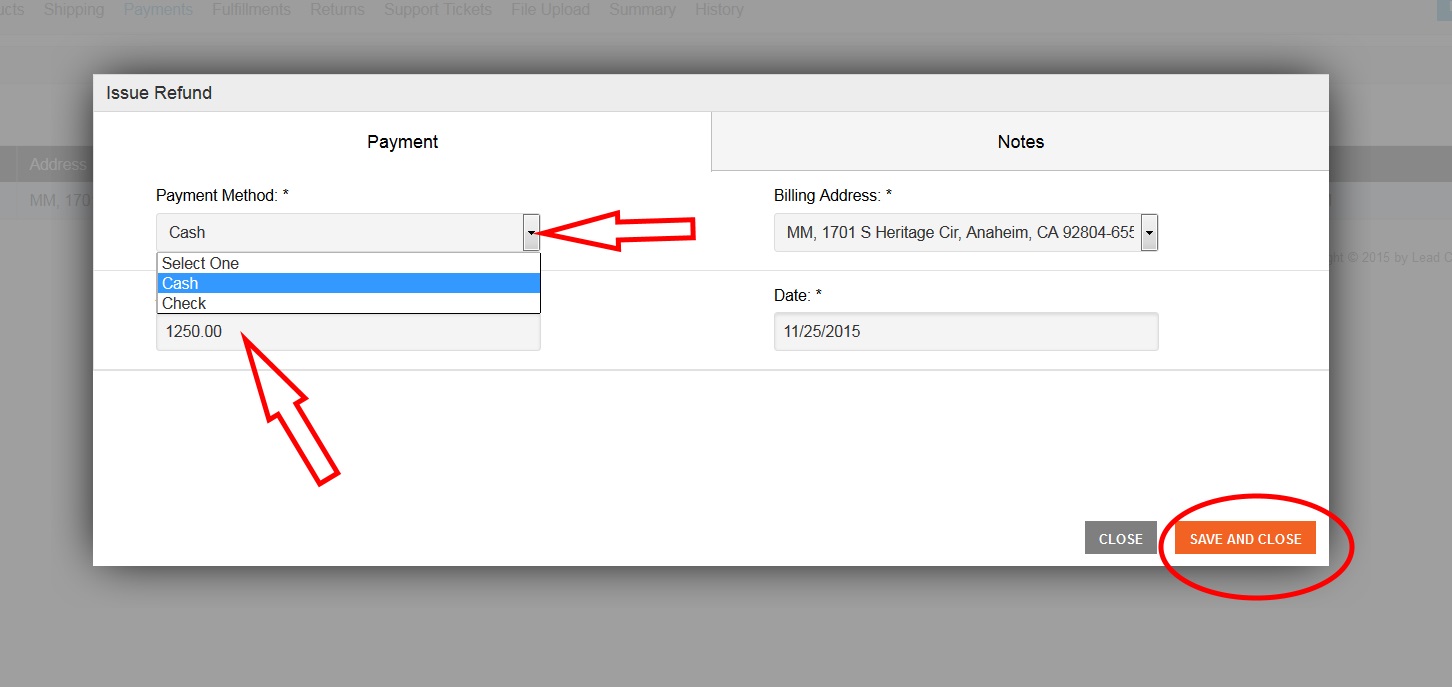
Step 19: Choose Payment Method
Step 20: Validate the correct Refund amount
Step 21: Click the orange "Save and Continue" button
Step 22: Validate the record and note Paid In Full
REMINDER: Shipping costs are not added into the refund system.

 Made with ❤ in the USA.
