This support article discusses how to subscribe to Stamps.com for use with the Lead Commerce platform.
In order for Lead Commerce to create shipping labels in the Back Office when you go to ship your items, you first need to create a Stamps.com account. The USPS only allows specific 3rd party companies to access their labeling system, which is why Lead Commerce requires you to establish a Stamps.com account first before being able to print labels from the Backoffice.
Step 1:
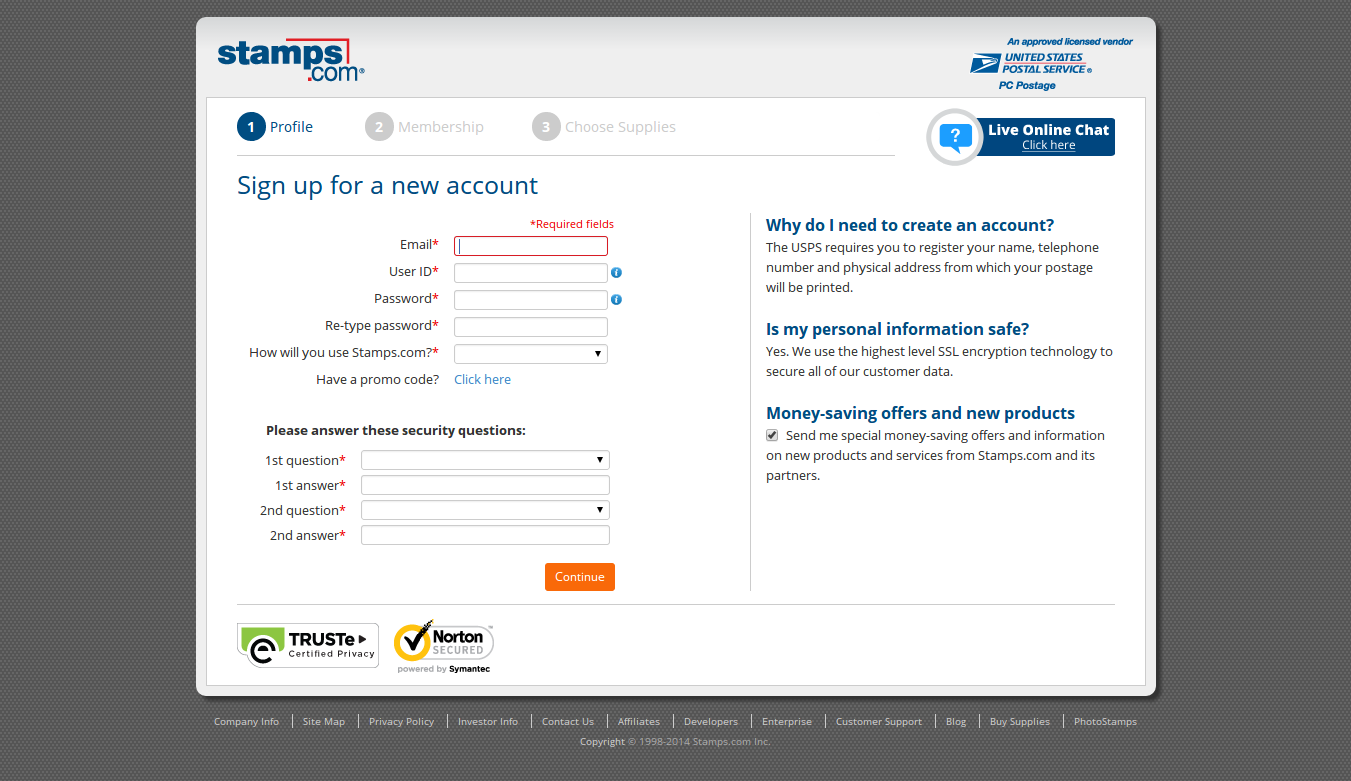
Navigate to stamps.com and click on the "Get Started" button. You will then be taken to Step 1 of the Stamps.com sign up form. Fill in the basic information.
PROMO CODE:
In the Promo Code area, click on the "Click Here" link and enter in "leadcommerce1" (without the quotes). By entering this code, you will receive lower rates than you could directly from USPS.
Remember to write down your username and password that you enter on this screen as well. These will be used when you go to setup USPS in the Back Office of Lead Commerce.

Step 2:
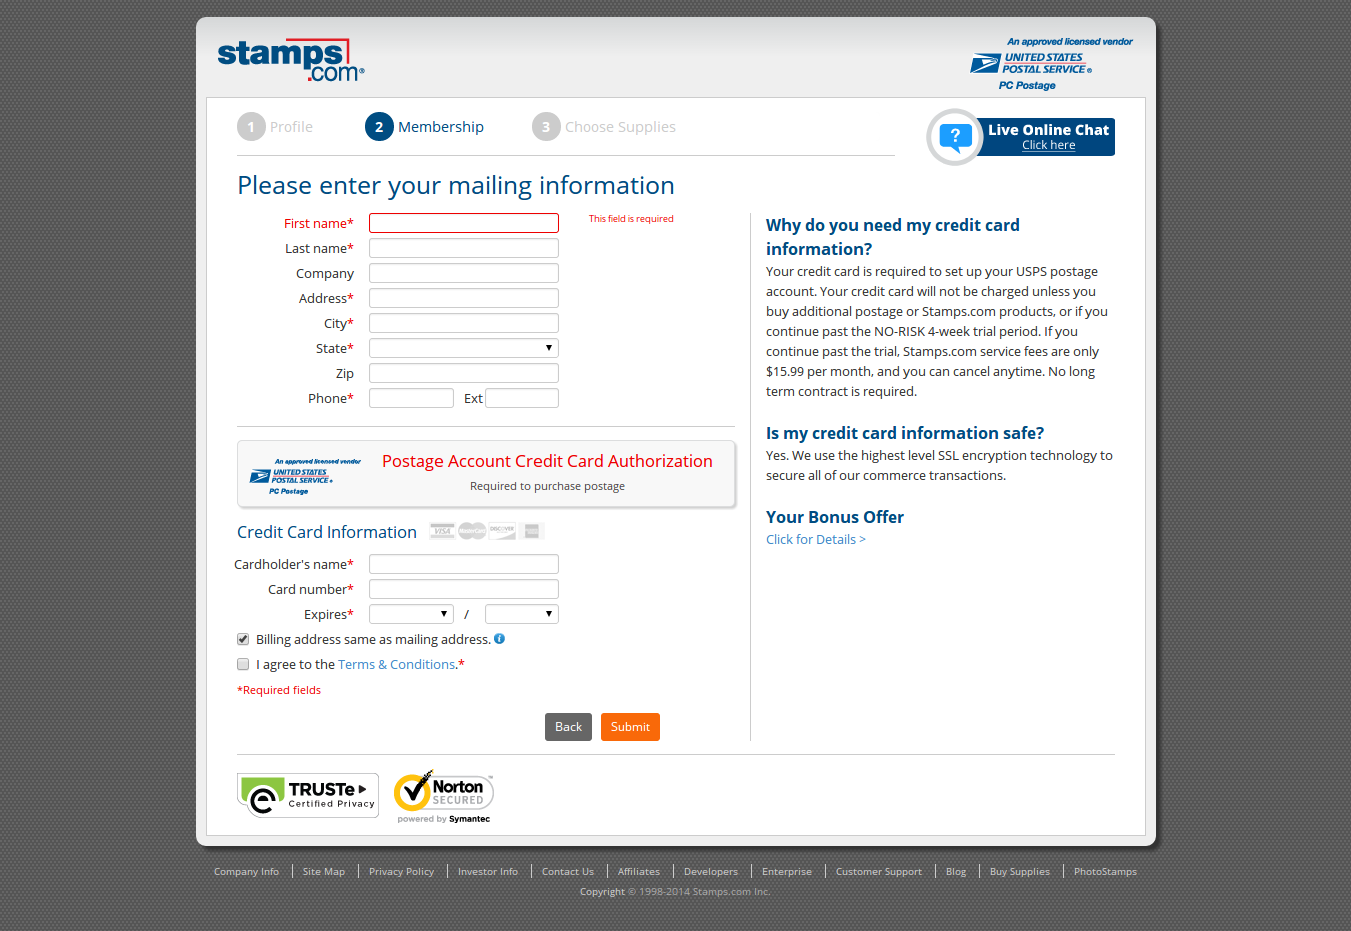
On the second step of the Stamps.com sign up page, enter in your mailing address. There will be an option at the bottom of the page that lets you enter in a different address for your credit cards billing address.

Step 3:
Step 3 will ask you to signup for promotional products like scales and supplies. If you do not need these items, you may skip them and move on to the next step.
IMPORTANT: You do not need to download the Stamps.com software. You will be prompted to do so, and it is not needed.
Once you have the account created, you can now configure Lead Commerce for USPS/Stamps.com here.

 Made with ❤ in the USA.
