Purchase Order Receipts can be used to create a record of the items on the PO that have been received. Lead Commerce gives you the flexibility to create as many receipts as you would like; however, the most common methods are to create one PO Receipt per Packing List from the Vendor.
Below is the process for creating a PO receipt after goods have been received on a Purchase Order. Note that you do not have to wait for the PO to be fully received before you create a receipt; however, you can only create a receipt for the items and quantities you have received.
Step 1: Open the Purchase Order that you would like to create a Receipt for. (This PO must be Received or Partially Received)

Step 2: Click on the "Receipts" tab and then click "New Receipt"

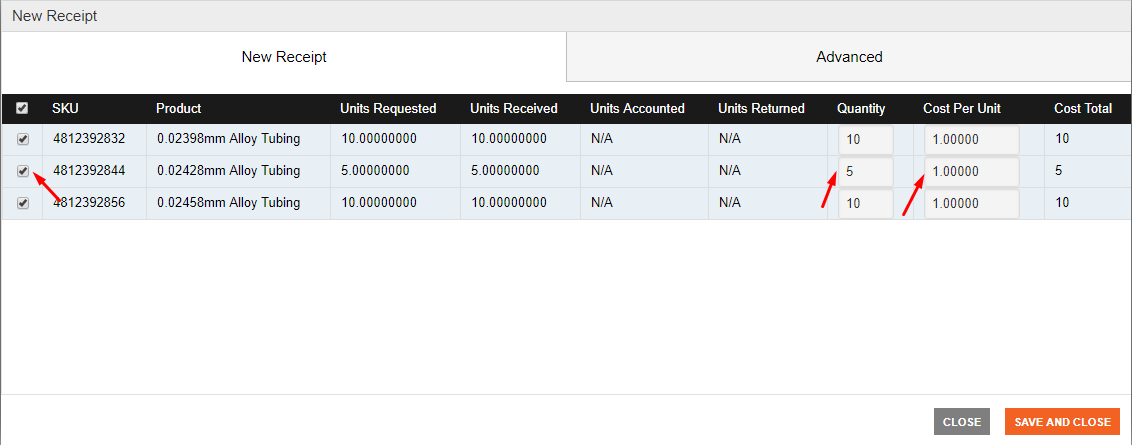
Step 3: Select the Items, Quantities, and Cost Per Unit that you want to create the Receipt for.
In this most cases, as in the example below, you will select all items and not make any changes to the quantity or cost. The cost shown here is the line item cost for the item on the Purchase Order. You can adjust the price if you need to take into account charges such as shipping. Since Purchase Order Receipts are typically used by accounting as a bill, only what is due to the vendor should be entered as the cost.

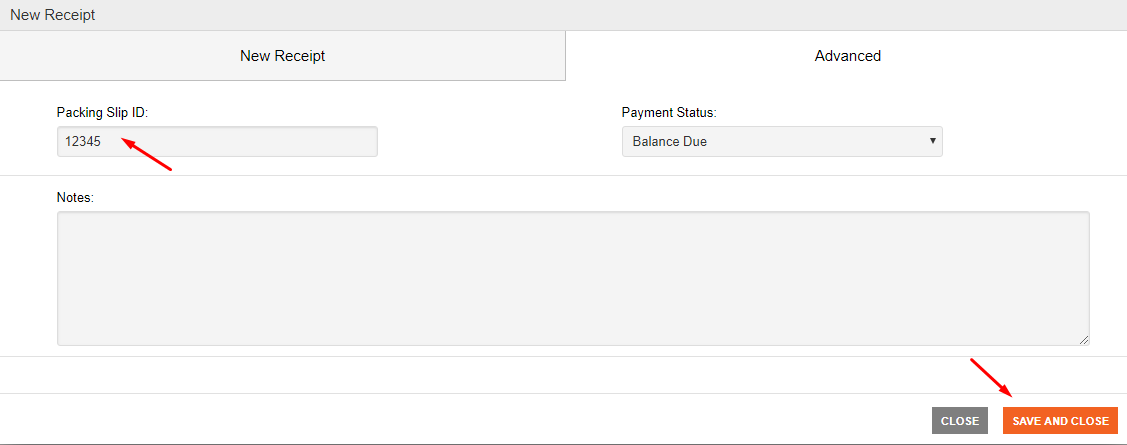
Step 4: Click on the "Advanced" tab where you can enter in the "Packing Slip ID" if desired and change the Payment Status if applicable.
Step 5: Click "Save and Close"

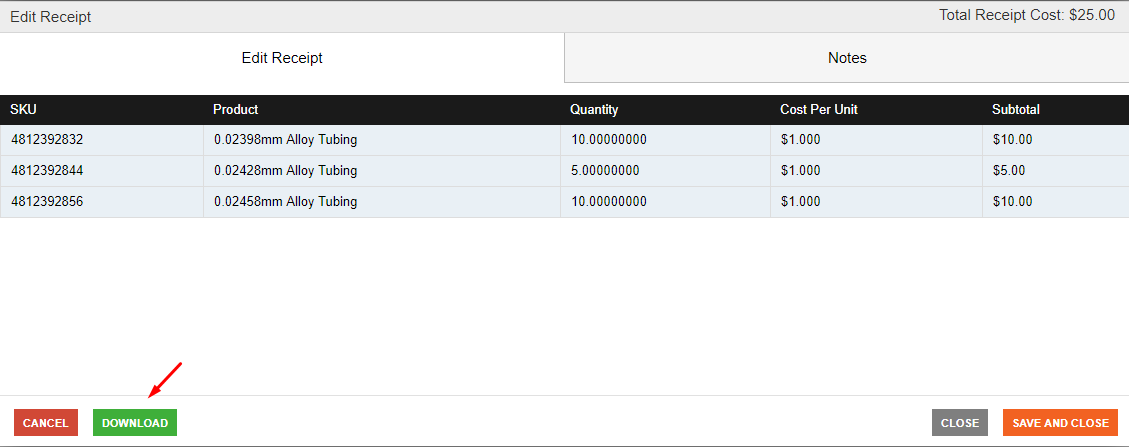
The receipt has now been created and you will see it listed under the Receipts tab under the Purchase Order.

If you would like to download the Receipt to be printed, you can do so by clicking the "Download" button.
This Receipt will now be available to Export as a Bill into QuickBooks

If you need to change any of the details on the Purchase Order Receipt once it has been created, you will need to cancel the Receipt and create a new one.

 Made with ❤ in the USA.
