This support article discusses what options are available to you for editing the base template of Lead Commerce. In the Content module, the Pages component contains two subcomponents: Pages and Navigation. This is where you will make basic website changes to your Storefront.
PLEASE NOTE: This guide only covers ways to change the website if you are using the base template of Lead Commerce. If you have made adjustments to the base template or had a 3rd party make changes for you, this guide may not support what you are trying to do.
Pages Subcomponent
Editing the Home Page
To edit the content of the home page use the Pages option, which can be found by going to Content > Pages. Then, search for the home page by using the search box and typing in Home. Drill into the Home record and locate the Content section. This will allow you to change the content that is displayed on the home page of your website. Other existing pages can be edited in this way, as well.
Adding New Pages
New Pages can be created in two ways, with the Create Page option in the Content section or by creating new categories and subcategories in the Catalog module. These pages can then be used on your Storefront.
Create Page Option
To create a new page, go to Content > Pages, and click on the orange Create Page button.

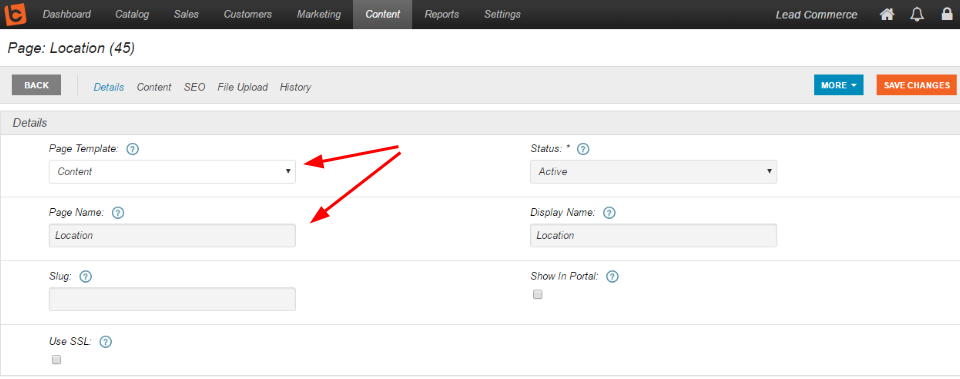
For example, let's say you want to create a new content page called Location. In the Page Template drop down, you would select Content. Then, enter a Page Name. Leave the Slug field blank, it will be created automatically.
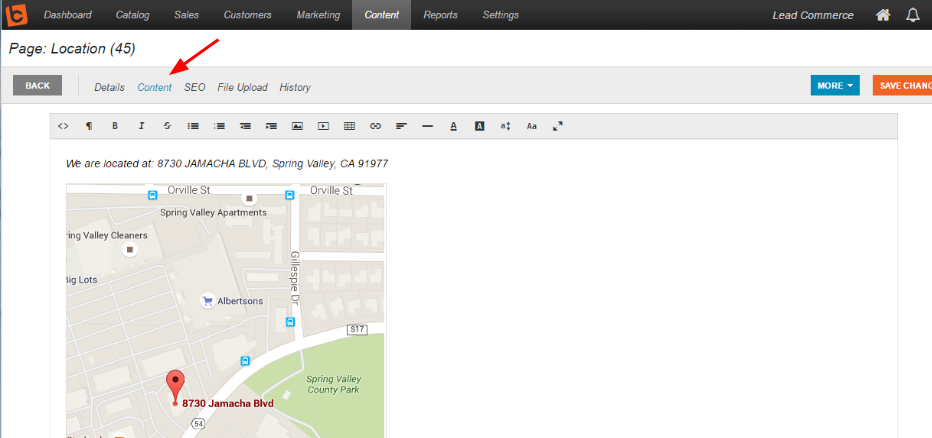
Next, you would go to the Content section and enter your data, including any desired images. There is a tool bar at the top for editing. Then, click Save Changes.
Adding New Categories Option
To add new categories, navigate to: Catalog > Products > Categories. Then, click on the orange Create Category button. Once you have created your new category and any desired subcategories, Pages will be created for each category and subcategory in the Content > Pages section mentioned above. These pages then become available for use on your Storefront.

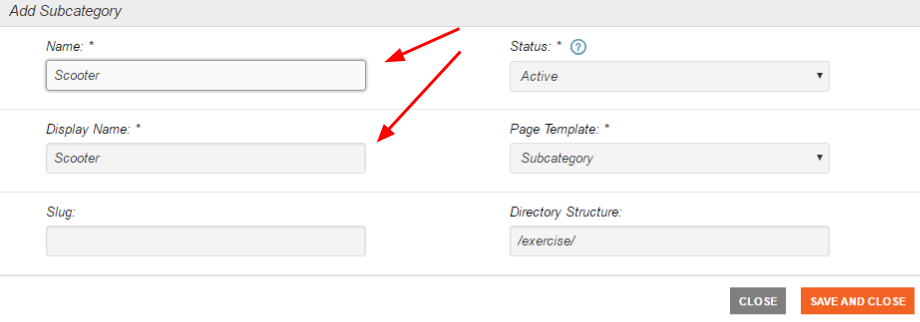
For example, let's say you want to create a new category called Exercise and include a product called Scooter to be used on your Storefront. In the Create Category window, enter the Name, then in the Page Template drop down select Category and in the Default Subcategory Template drop down select Subcategory.

Next, click on the Subcategories section and add your subcategory called Scooter.
Next, you would go to your Product and and make sure the Category and Subcategory fields are checked. This will allow your product to be displayed on the Storefront. In the File Upload section, you can upload an image that will be displayed on your Storefront for this product, too.

Navigation Subcomponent
To adjust the order and menu options found in the main navigation of the base template go to:
Content > Pages > Navigation > Primary Navigation
Here you can adjust the items that display in the menu list and also control the order from left to right. Use the Links section to add new pages and categories to your navigation. Use the Order section to control the order of your main menu options from left to right.
Adding Links to the Main Navigation
You can use links to add new menu list options to your Storefront. Click on the green Add Another button under the Links section of the Primary Navigation record. There are different types of Links you can add to your navigation. For example, you can add a Category as an example to the main navigation by choosing the Category option. Choose Category then choose the Category or Subcategory you want to link to in the main navigation and save.
Other useful links include External URL, Pages and Products.
For example, if you wanted to add a link for the Page created above called Location. You would click on the green Add Another button and enter the information as shown below:

Applying Order to the Main Navigation
You can order your navigation from left to right using the Order option on the Primary Navigation record. Navigate to:
Content > Pages > Navigation > Primary Navigation > Order Section
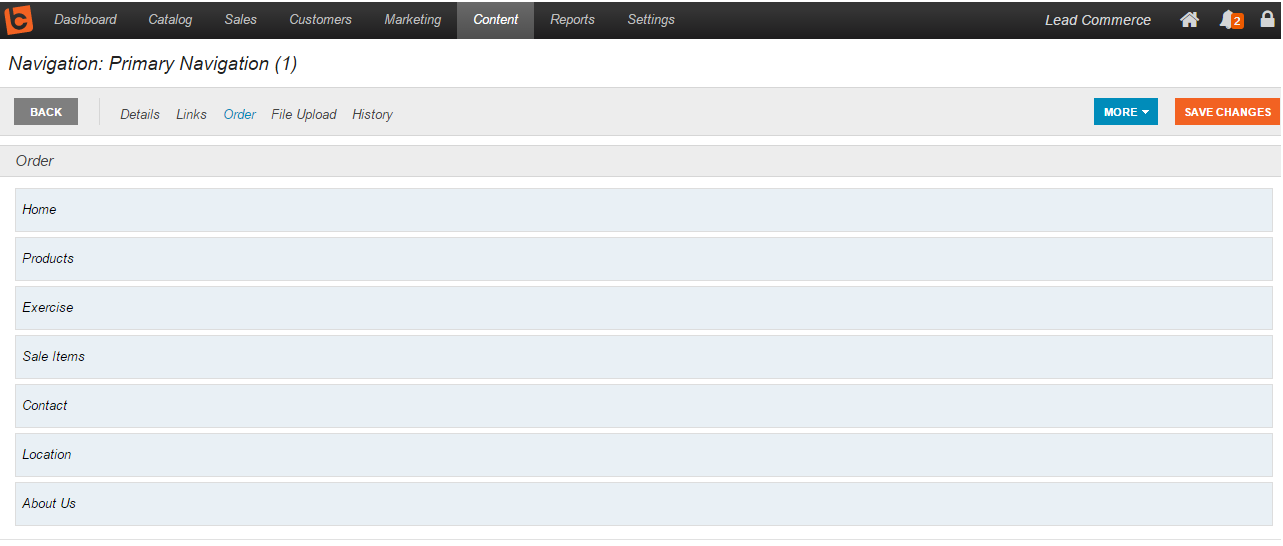
The Order section allows you drag and drop from top to bottom the order of items which will then order your menu list items on your website from left to right.
Editing Displayed Business Information
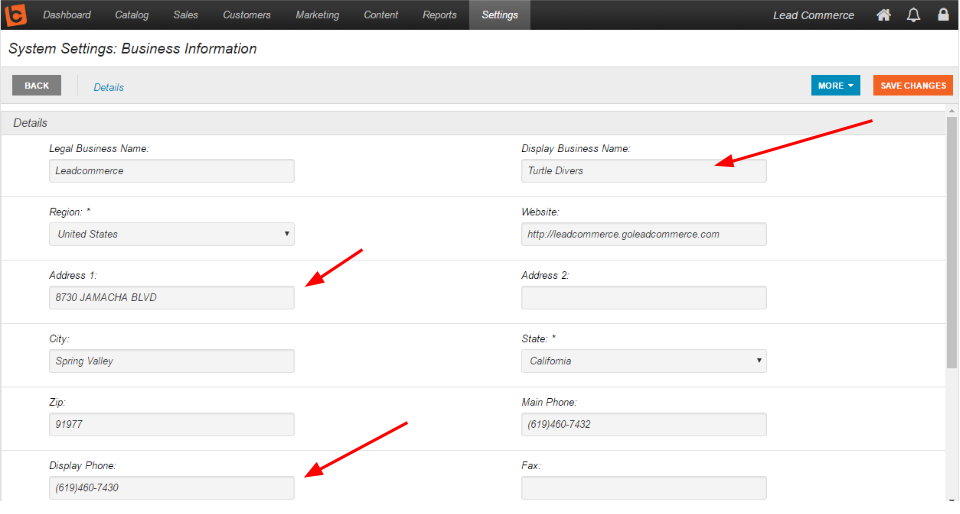
To edit the displayed business name, address and phone number, go to Settings > General Settings > System Settings > Business Information. To edit the business name that will be displayed throughout the website, edit the Display Business Name field on this screen. To edit the address, simply edit the address related fields on this screen. And, to edit the phone number, use the Display Phone field on this screen.

 Made with ❤ in the USA.
