This article discusses how to configure the Lead Commerce platform for use with Stripe.
The first step to using Stripe as a payment gateway with Lead Commerce is to create an account with Stripe. You can create an account by visiting their site here.
Once you have established an account with the Stripe gateway, you will then need to log into your Stripe account and select the Account Settings.

The Account settings are located in the top righthand corner of the Stripe gateway admin area.
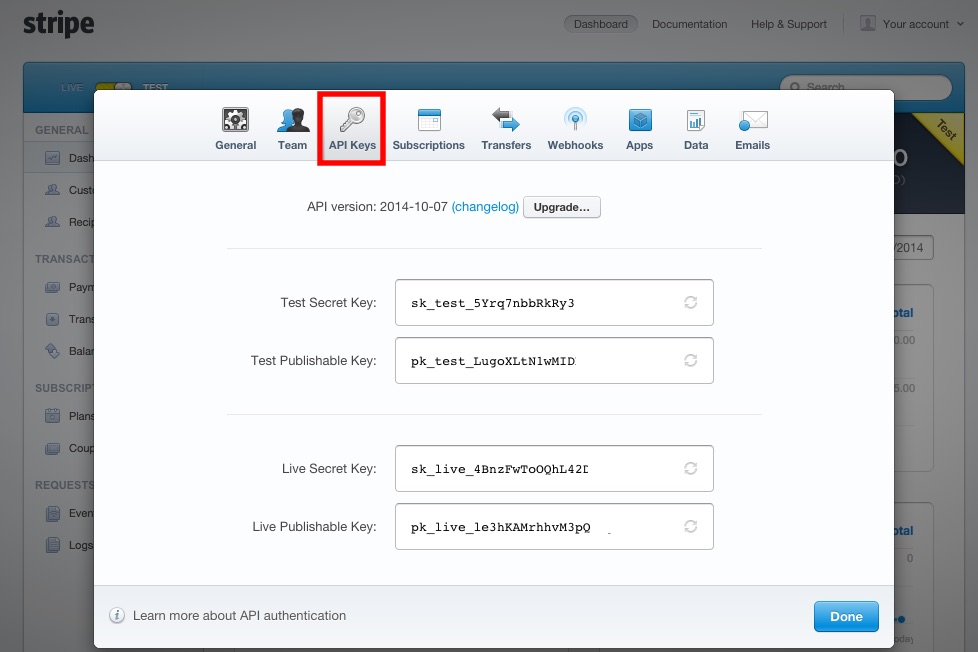
The next step is to select Account Settings and then select API Keys.

Once you have the four keys copied, log into the Back Office of Lead Commerce and go to:
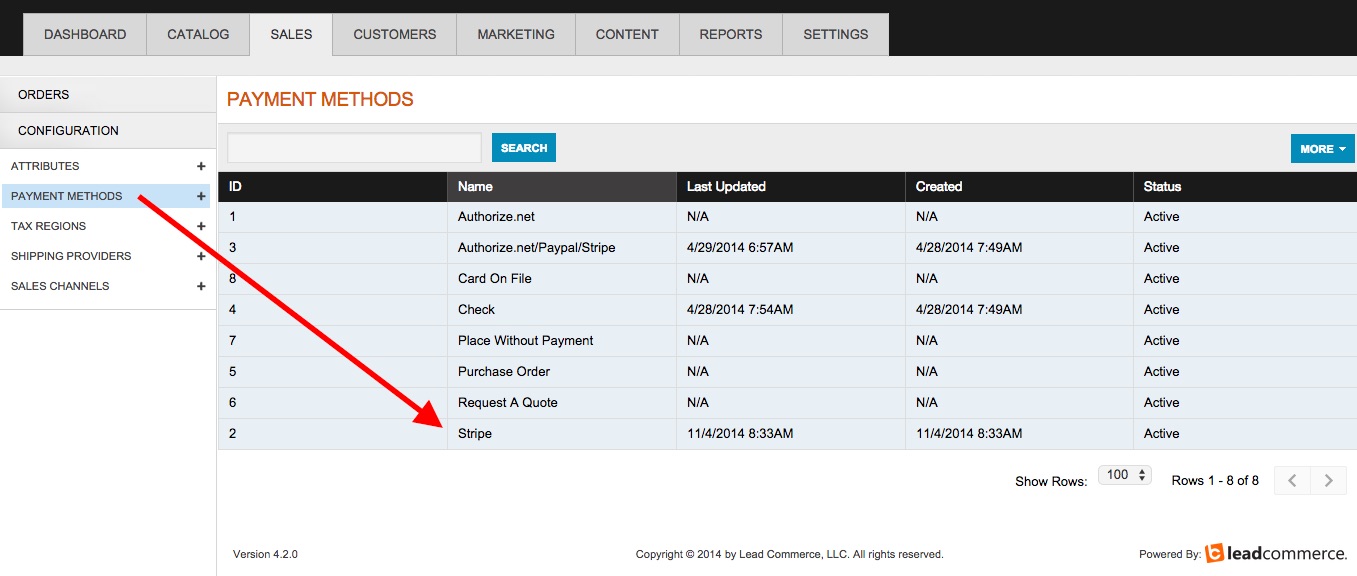
Sales > Configuration > Payment Methods

Click on the Payment Method "Stripe".
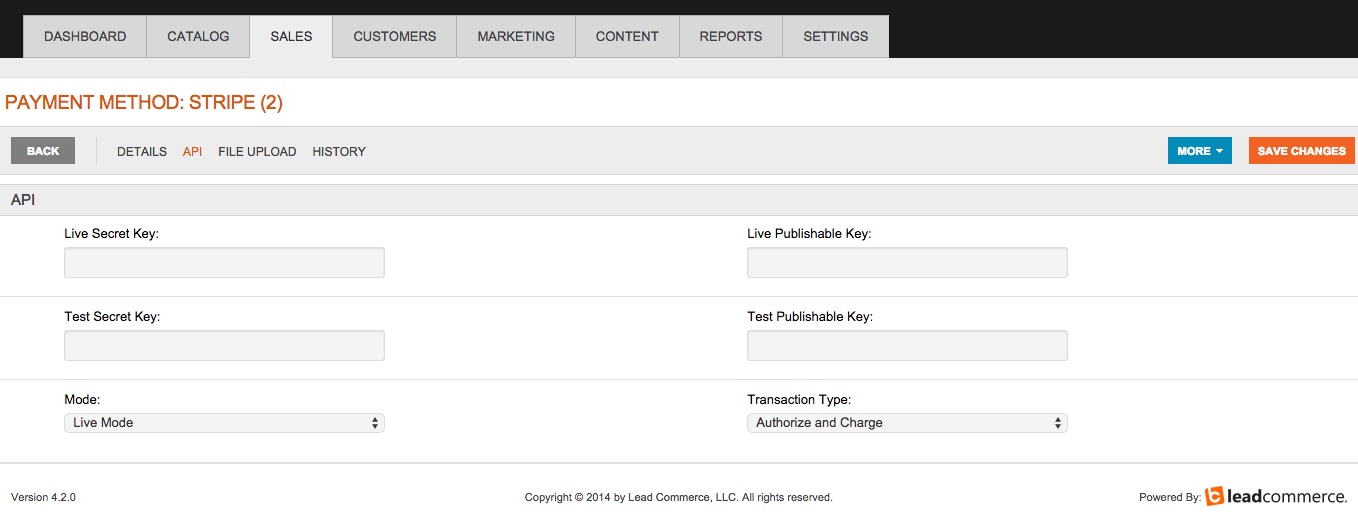
On the Stripe drill down screen select the section called API and then fill out the required API keys.

IMPORTANT: Please ensure that you copy the keys into the correct fields and note that there are two Test Keys and two (2) Live Keys. These need to be copied verbatim from the Stripe API fields and pasted in.
Test Mode versus Live Mode
Please ensure that the Stripe gateway is not in Test Mode if you plan on using the gateway immediately. You will also need to ensure that the Mode is set to Live in Lead Commerce as well in order to successfully charge your customers credit cards. In most cases, Test Mode should remain on until you are ready to go live.
To test your gateway to make sure everything is configured correctly, you can use a test card located here.

 Made with ❤ in the USA.
