This support article discusses how to use the Import and Export functionality of Lead Commerce to update your SKUs.
IMPORTANT ! ! Please read the ENTIRE article FIRST. There are some additional Rules/Tips down at the bottom.
Step 1
Export out your SKUs
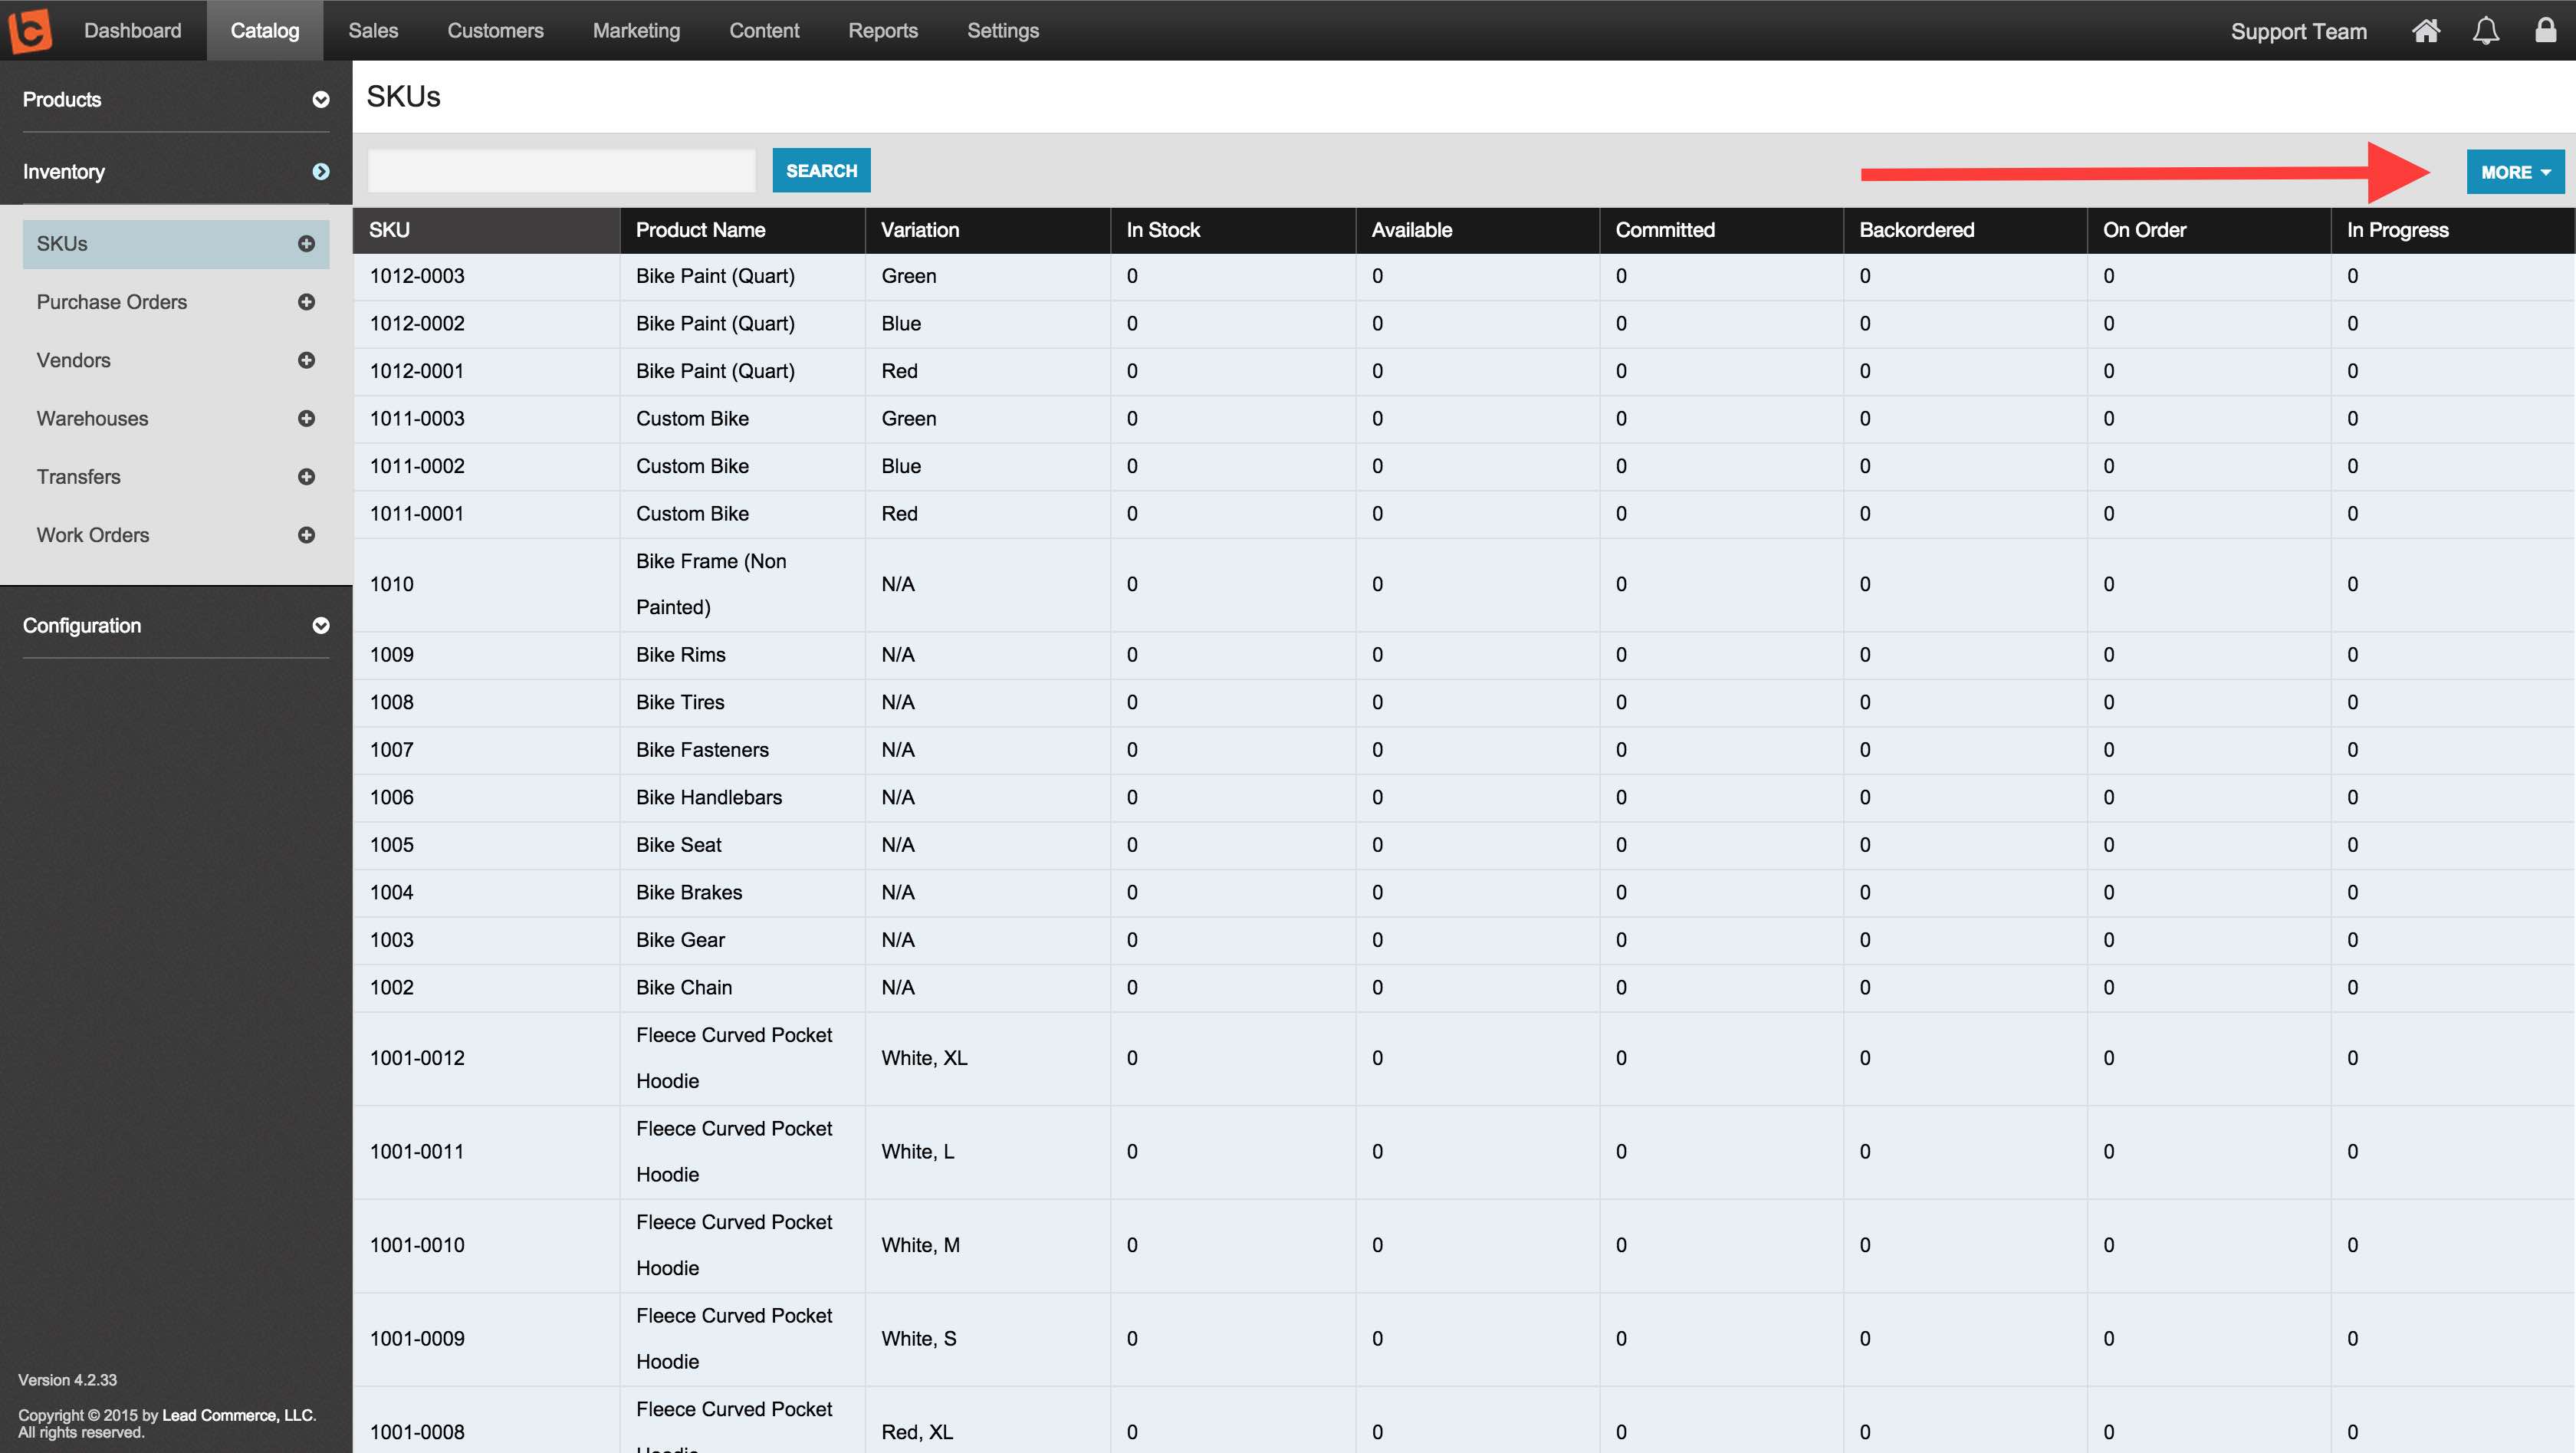
In order to update your SKUs, you need to first export out the raw data from Lead Commerce. To do this, go to Catalog > Inventory > SKUs and then click on the More meu

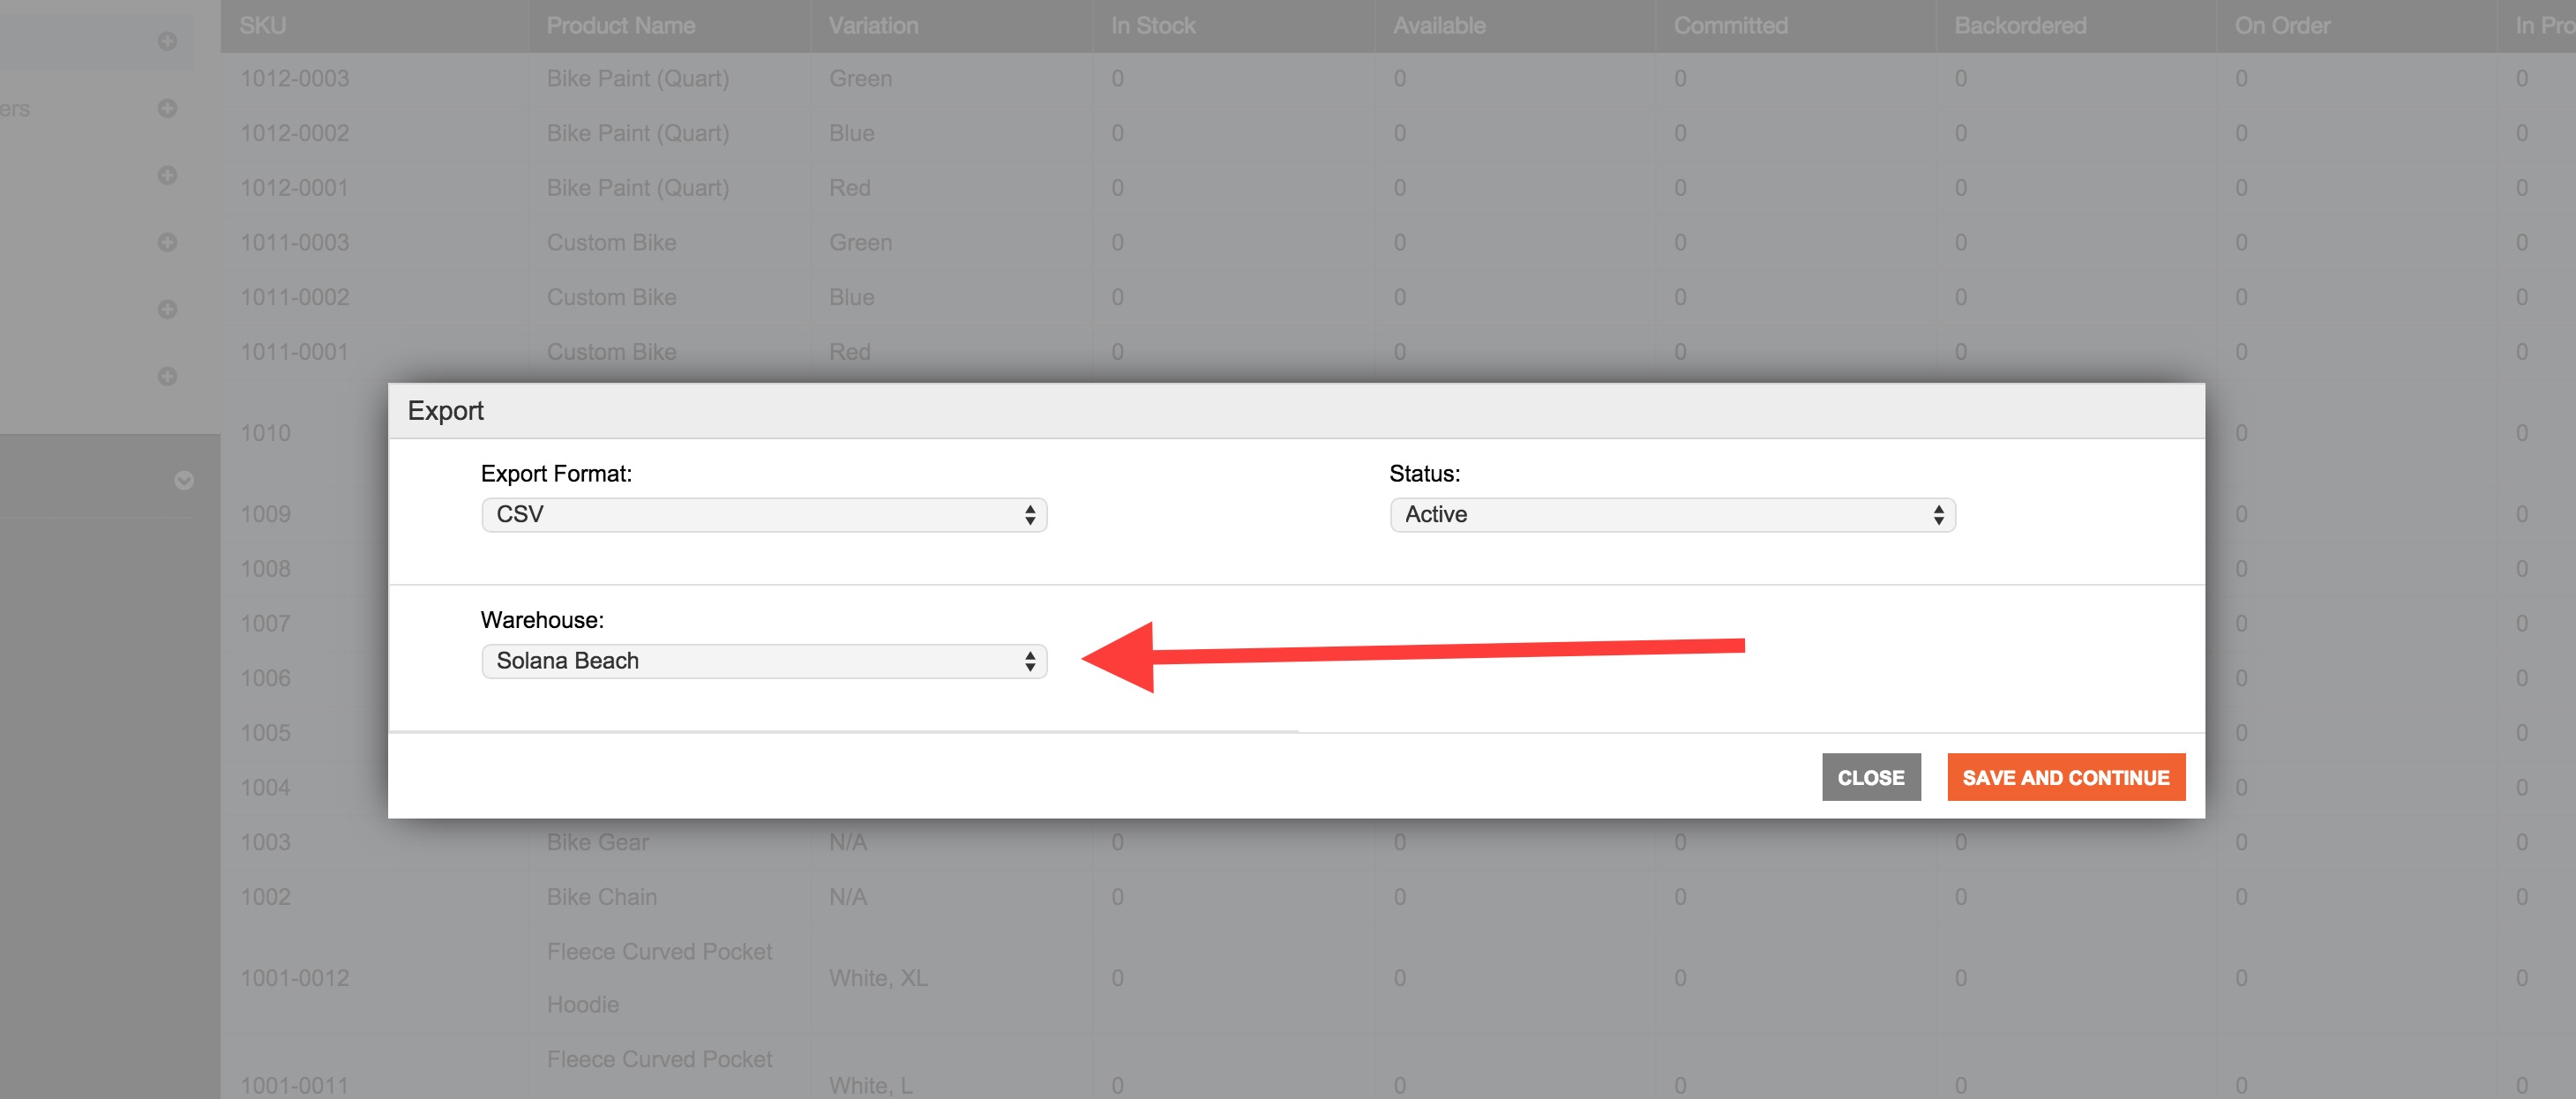
Ensure you select the correct Warehouse:

The SKU Export will then be emailed to you.
Step 2:
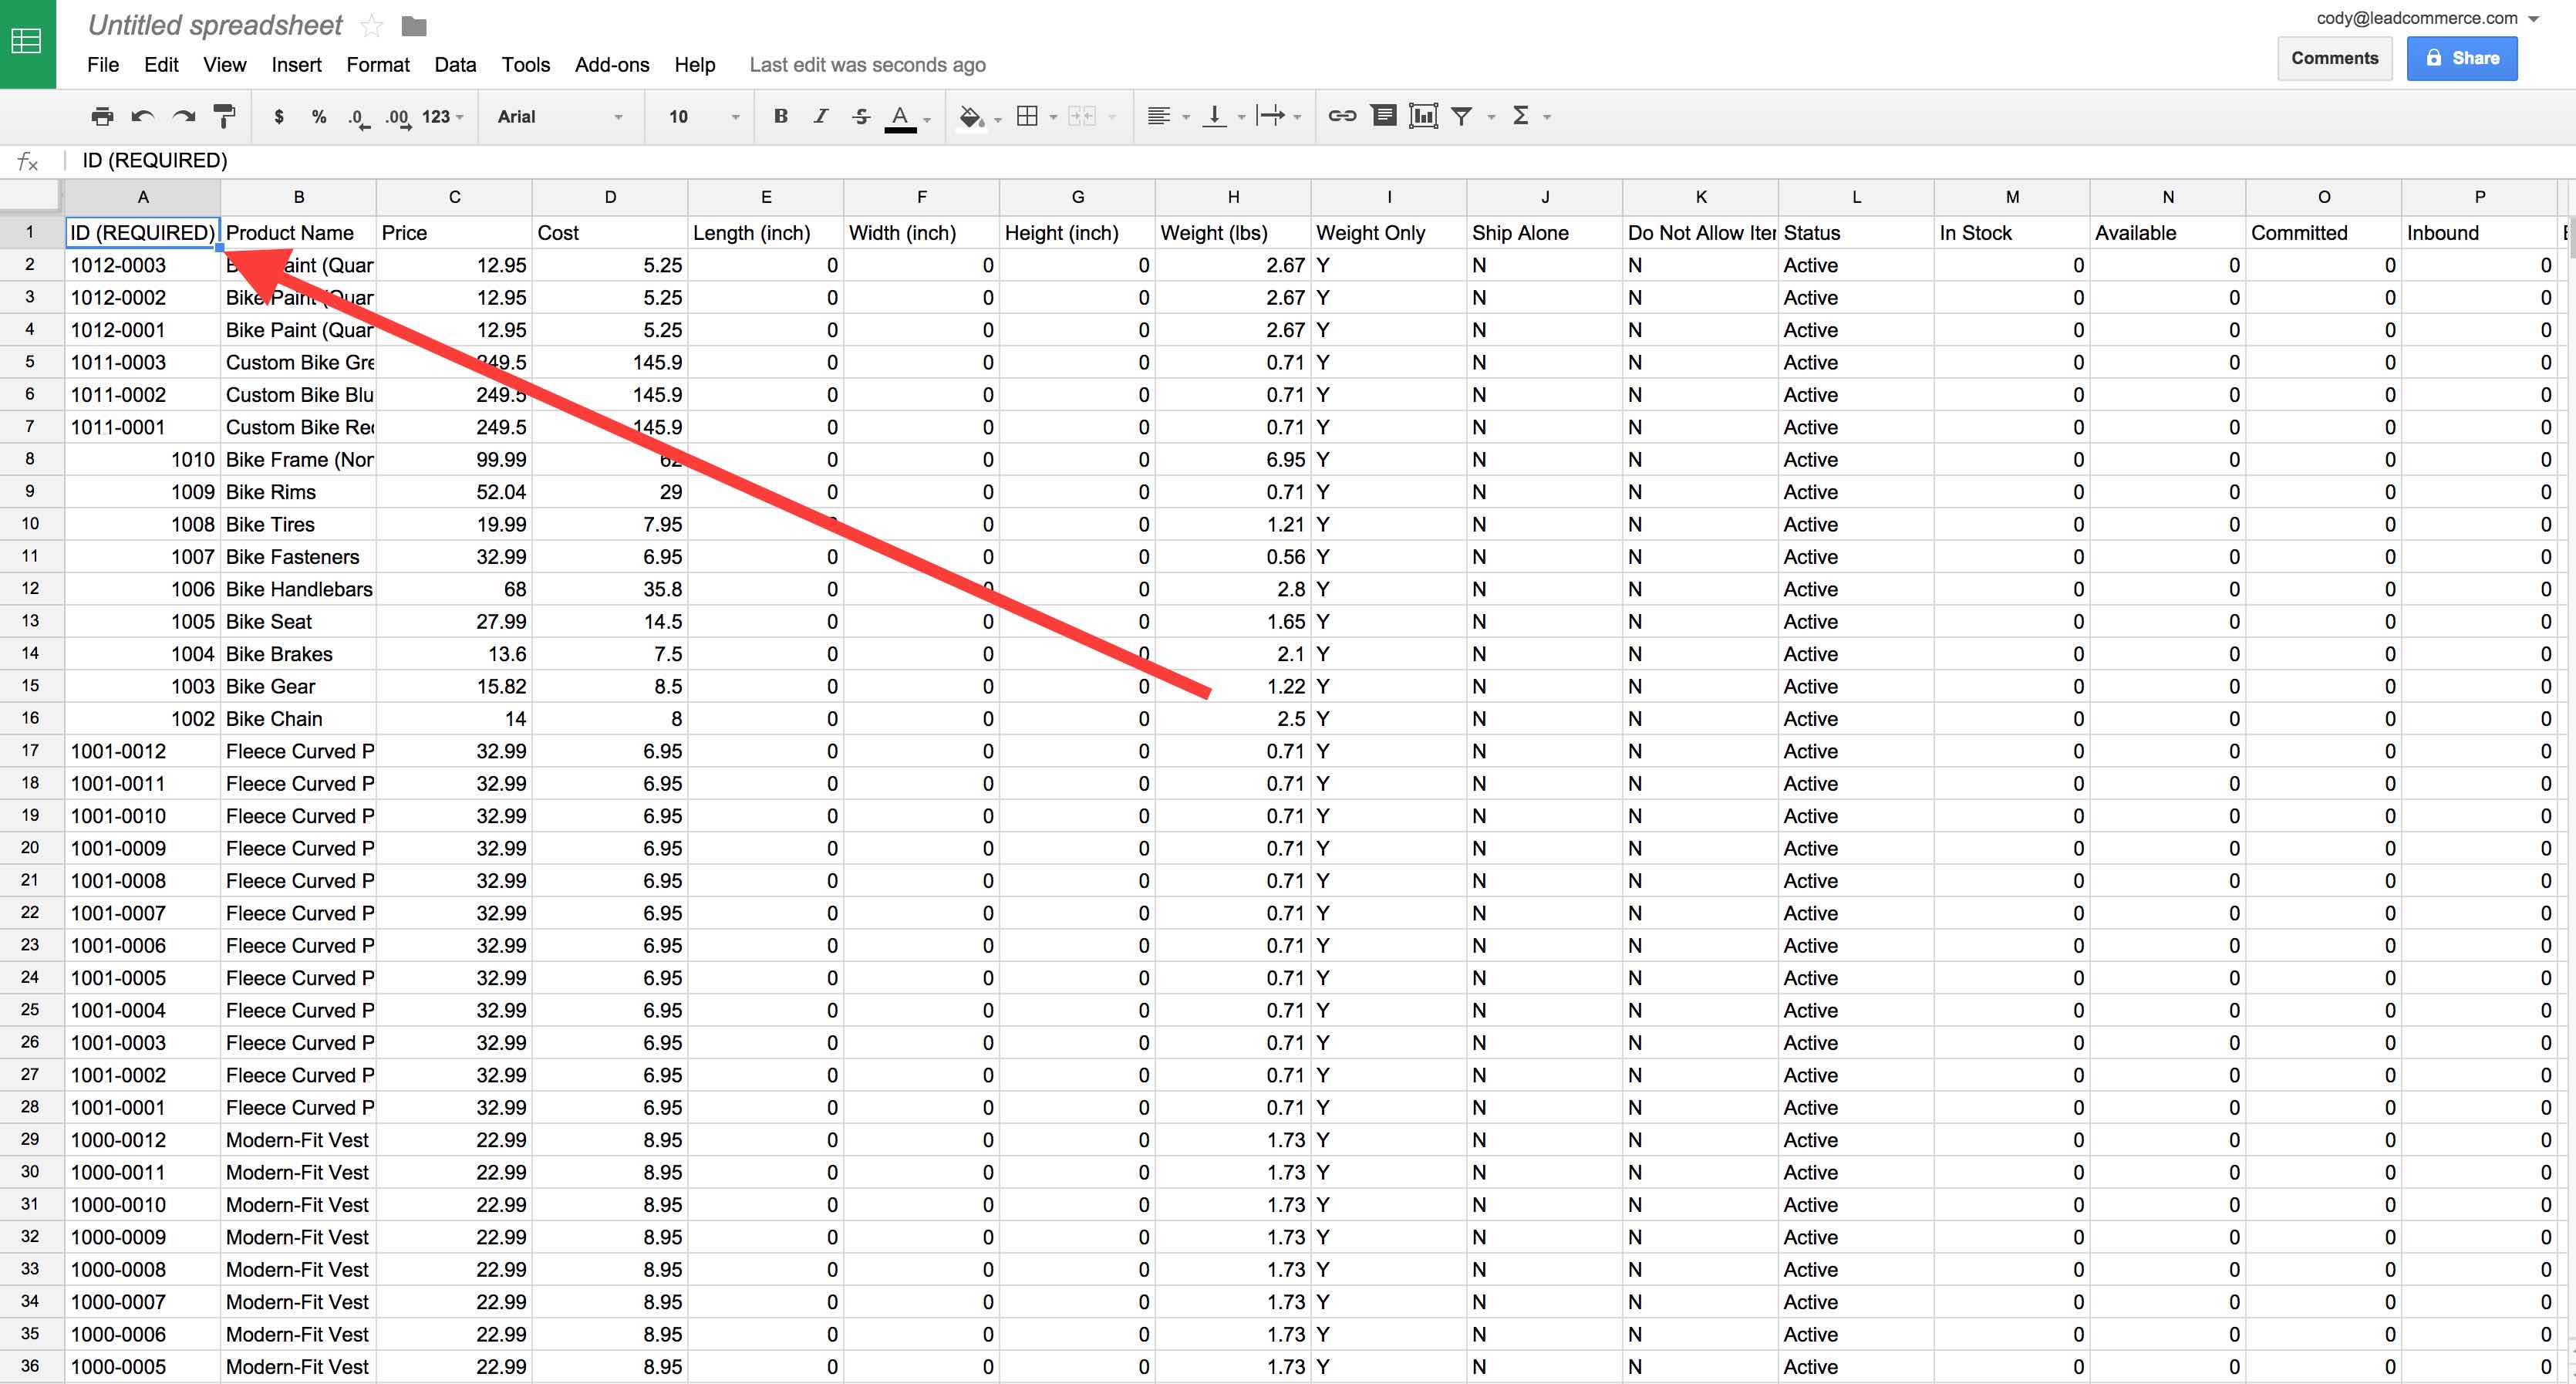
Once you have downloaded the exported CSV from Lead Commerce open it up in a spreadsheet software product like Google Sheets or Microsoft Excel.

PLEASE NOTE: The first column in the file is the ID Required column. This is the column that will be used when you Import the updated version of the CSV back into Lead Commerce. Please make sure you DO NOT remove this column, otherwise, you will not be able to complete the Import with your changes.
Step 3:
Once you have completed your changes to the CSV file, export it out of your spreadsheet software program as a CSV.
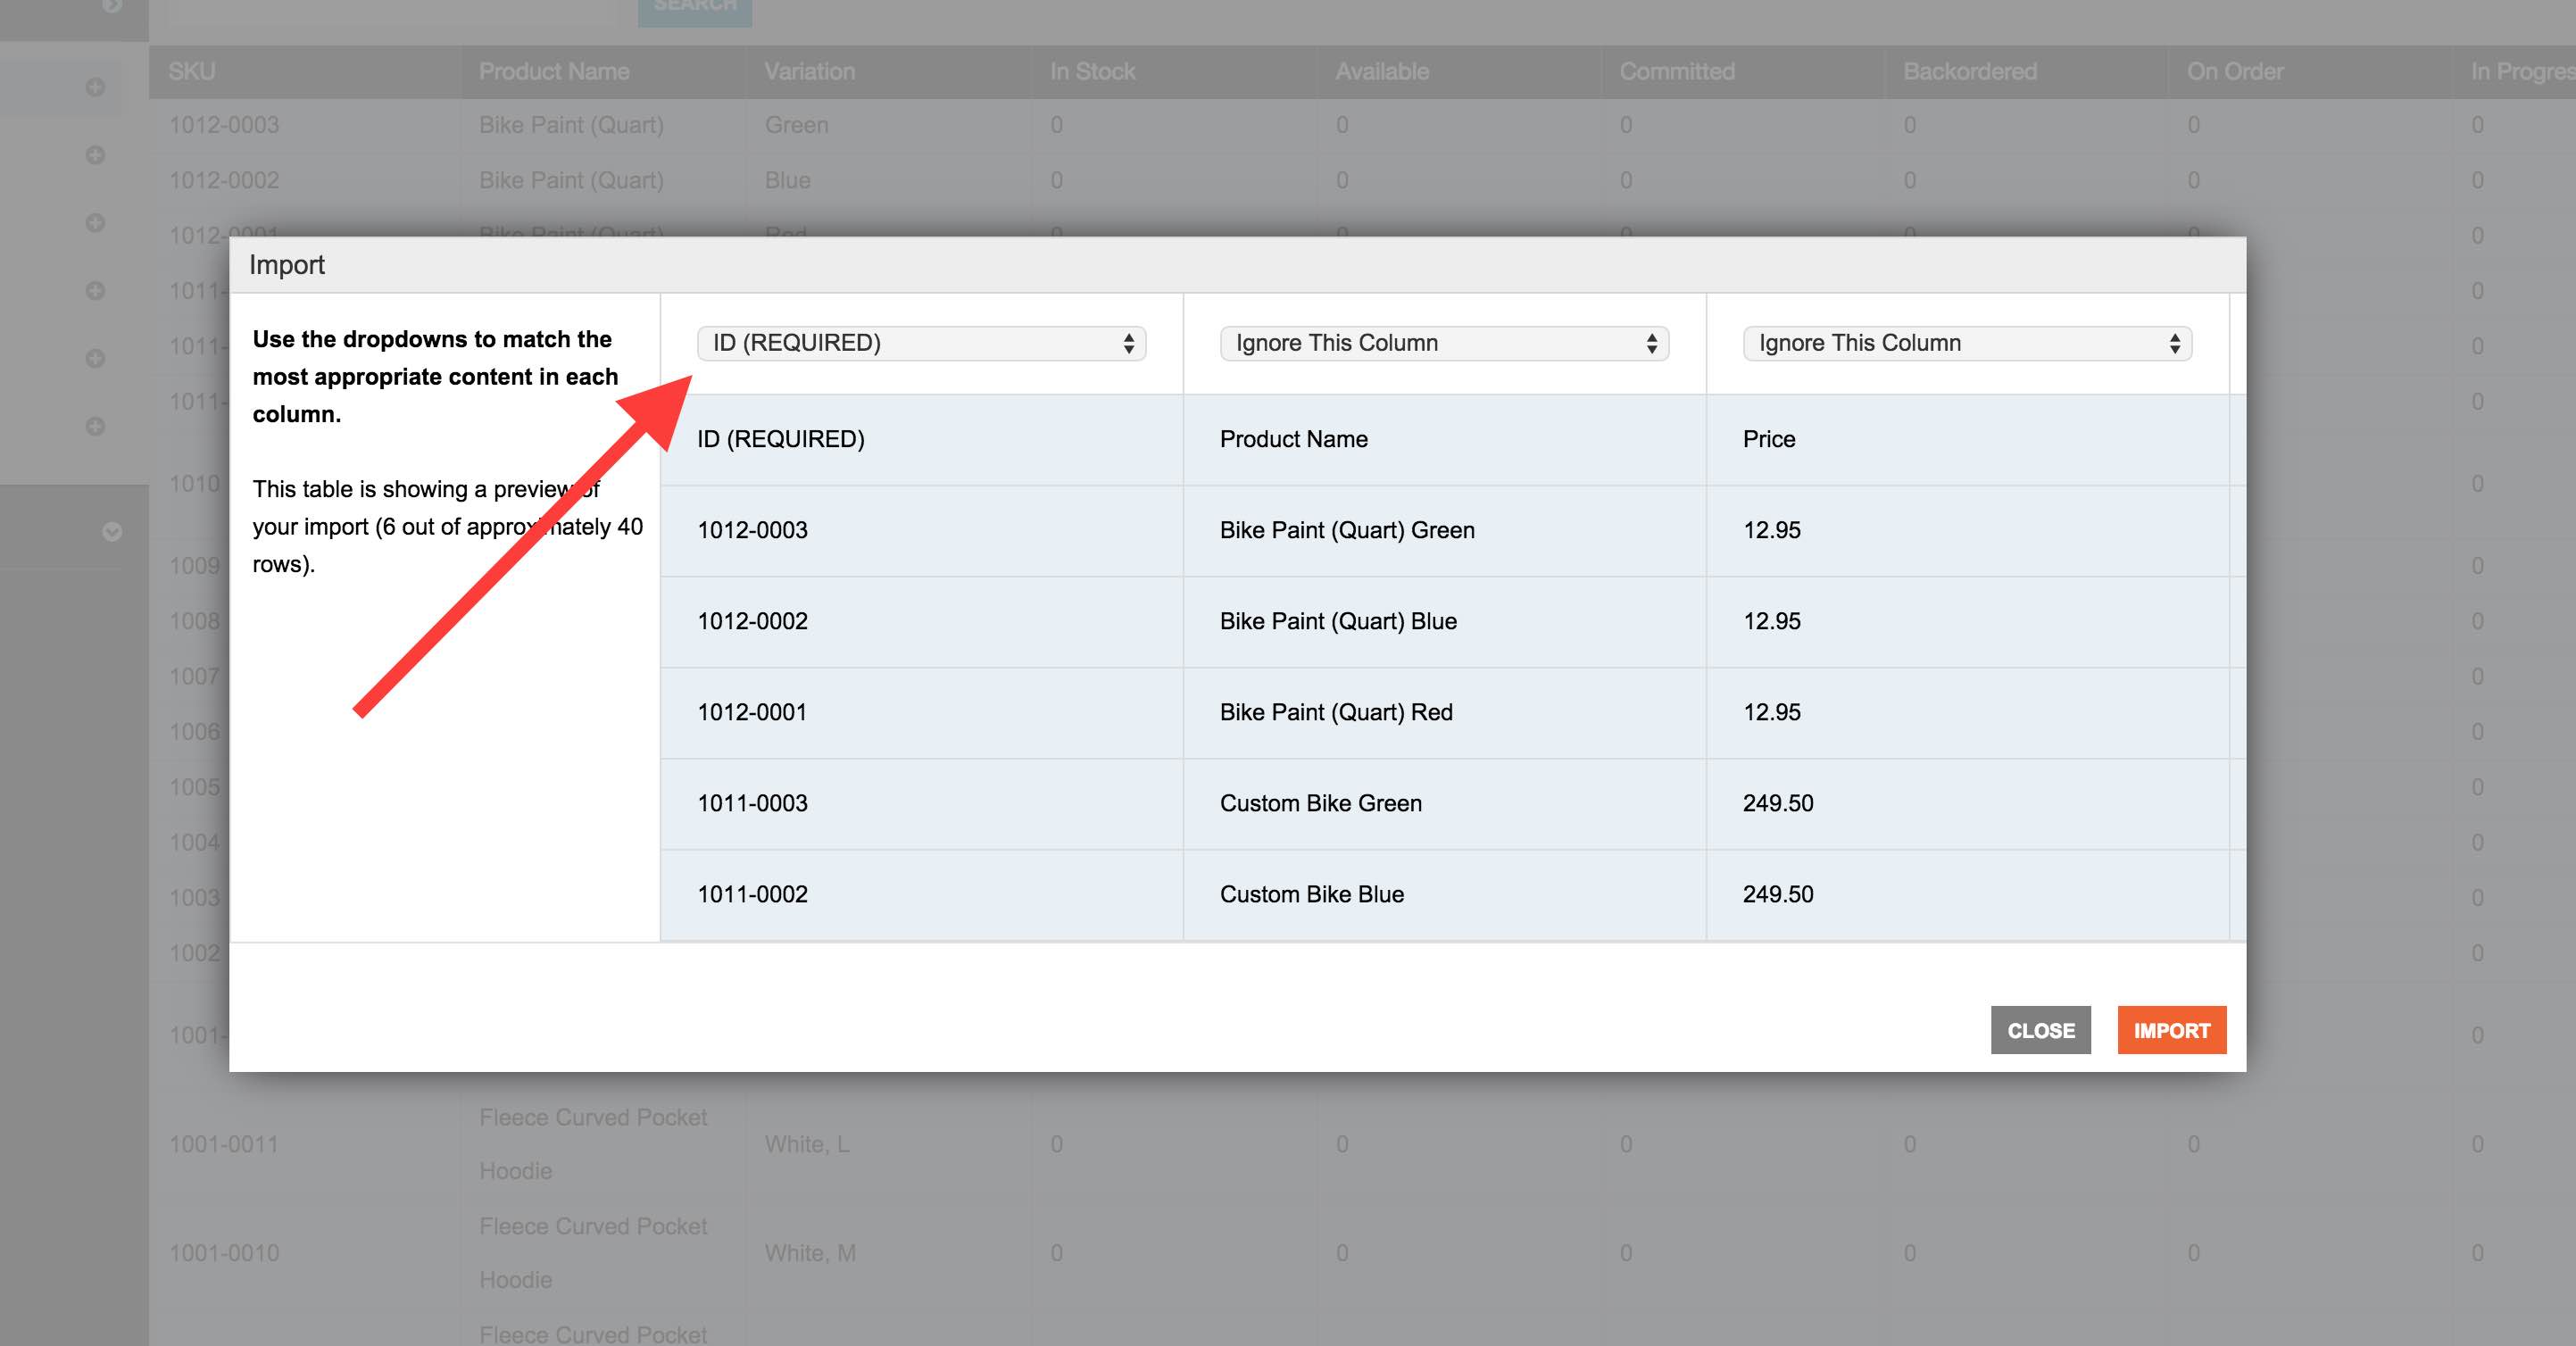
PLEASE NOTE: Take care to map the ID Required column to the ID Required field in the SKU Import.

Important Rules/Tips to Follow when Importing
- Always start with a fresh export.
- When importing your CSV, check your ID's after. If you are using variations, or if your SKUS begin with "0" or contain "-", your spreadsheet program may convert those to dates or some other values that you don't want. On Google Sheets specifically you can insist to not convert to numbers during the import.
- When editing your export, make new columns for your changes, such as "Update SKU" next to "SKU". This way you can see the before and after. Also this will help you with the next step.
- If you are changing some "complex" fields, like a Product with multiple vendors, a good practice would be to make a change to one of the products inside of your deployment, then perform the export. Once you have the export you can copy what is in that cell to other products you want to update with the same information. It's easy to make a formatting error / typo / or case-sensitive mistake, which could cause your import to error or stall out.
- Before importing, filter out all of the lines that you aren't changing. This makes the import go quicker and also it will only mark the ones you really updated as updated. If you still have lots of lines to update (ex 1000+), we would recommend that you split it into multiple imports.
- When importing, map ONLY the fields that you want to change. You do not have to map every field.
- When importing multiple changes, it is best to do one change at a time (or in groups). For example, if you want to update the Custom SKU, Cost and Price. You should do one import with SKU and a second with the cost and price. You can use the same document, just map different fields each time.
- In addition, when updating your Custom SKU or Custom Product ID, you should map only that field in the import. As above, break the import into groups.
- If you run into errors on your import, try tracing it back up the flow. For example, you may be able to update a Product with a specific vendor if that product's Product Type does not include that vendor. You can also troubleshoot this by importing less products or mapping less fields as mentioned above.
- Lastly, if you have performed an import and have not yet received a confirmation email, and it has been quite a while (30 minutes), you should email [email protected] with a detail of what you were trying to do, the fields you mapped, and a copy of the file you were importing.

 Made with ❤ in the USA.
