This support article covers the Pick and Pack option of the Lead Commerce barcode scanner feature.
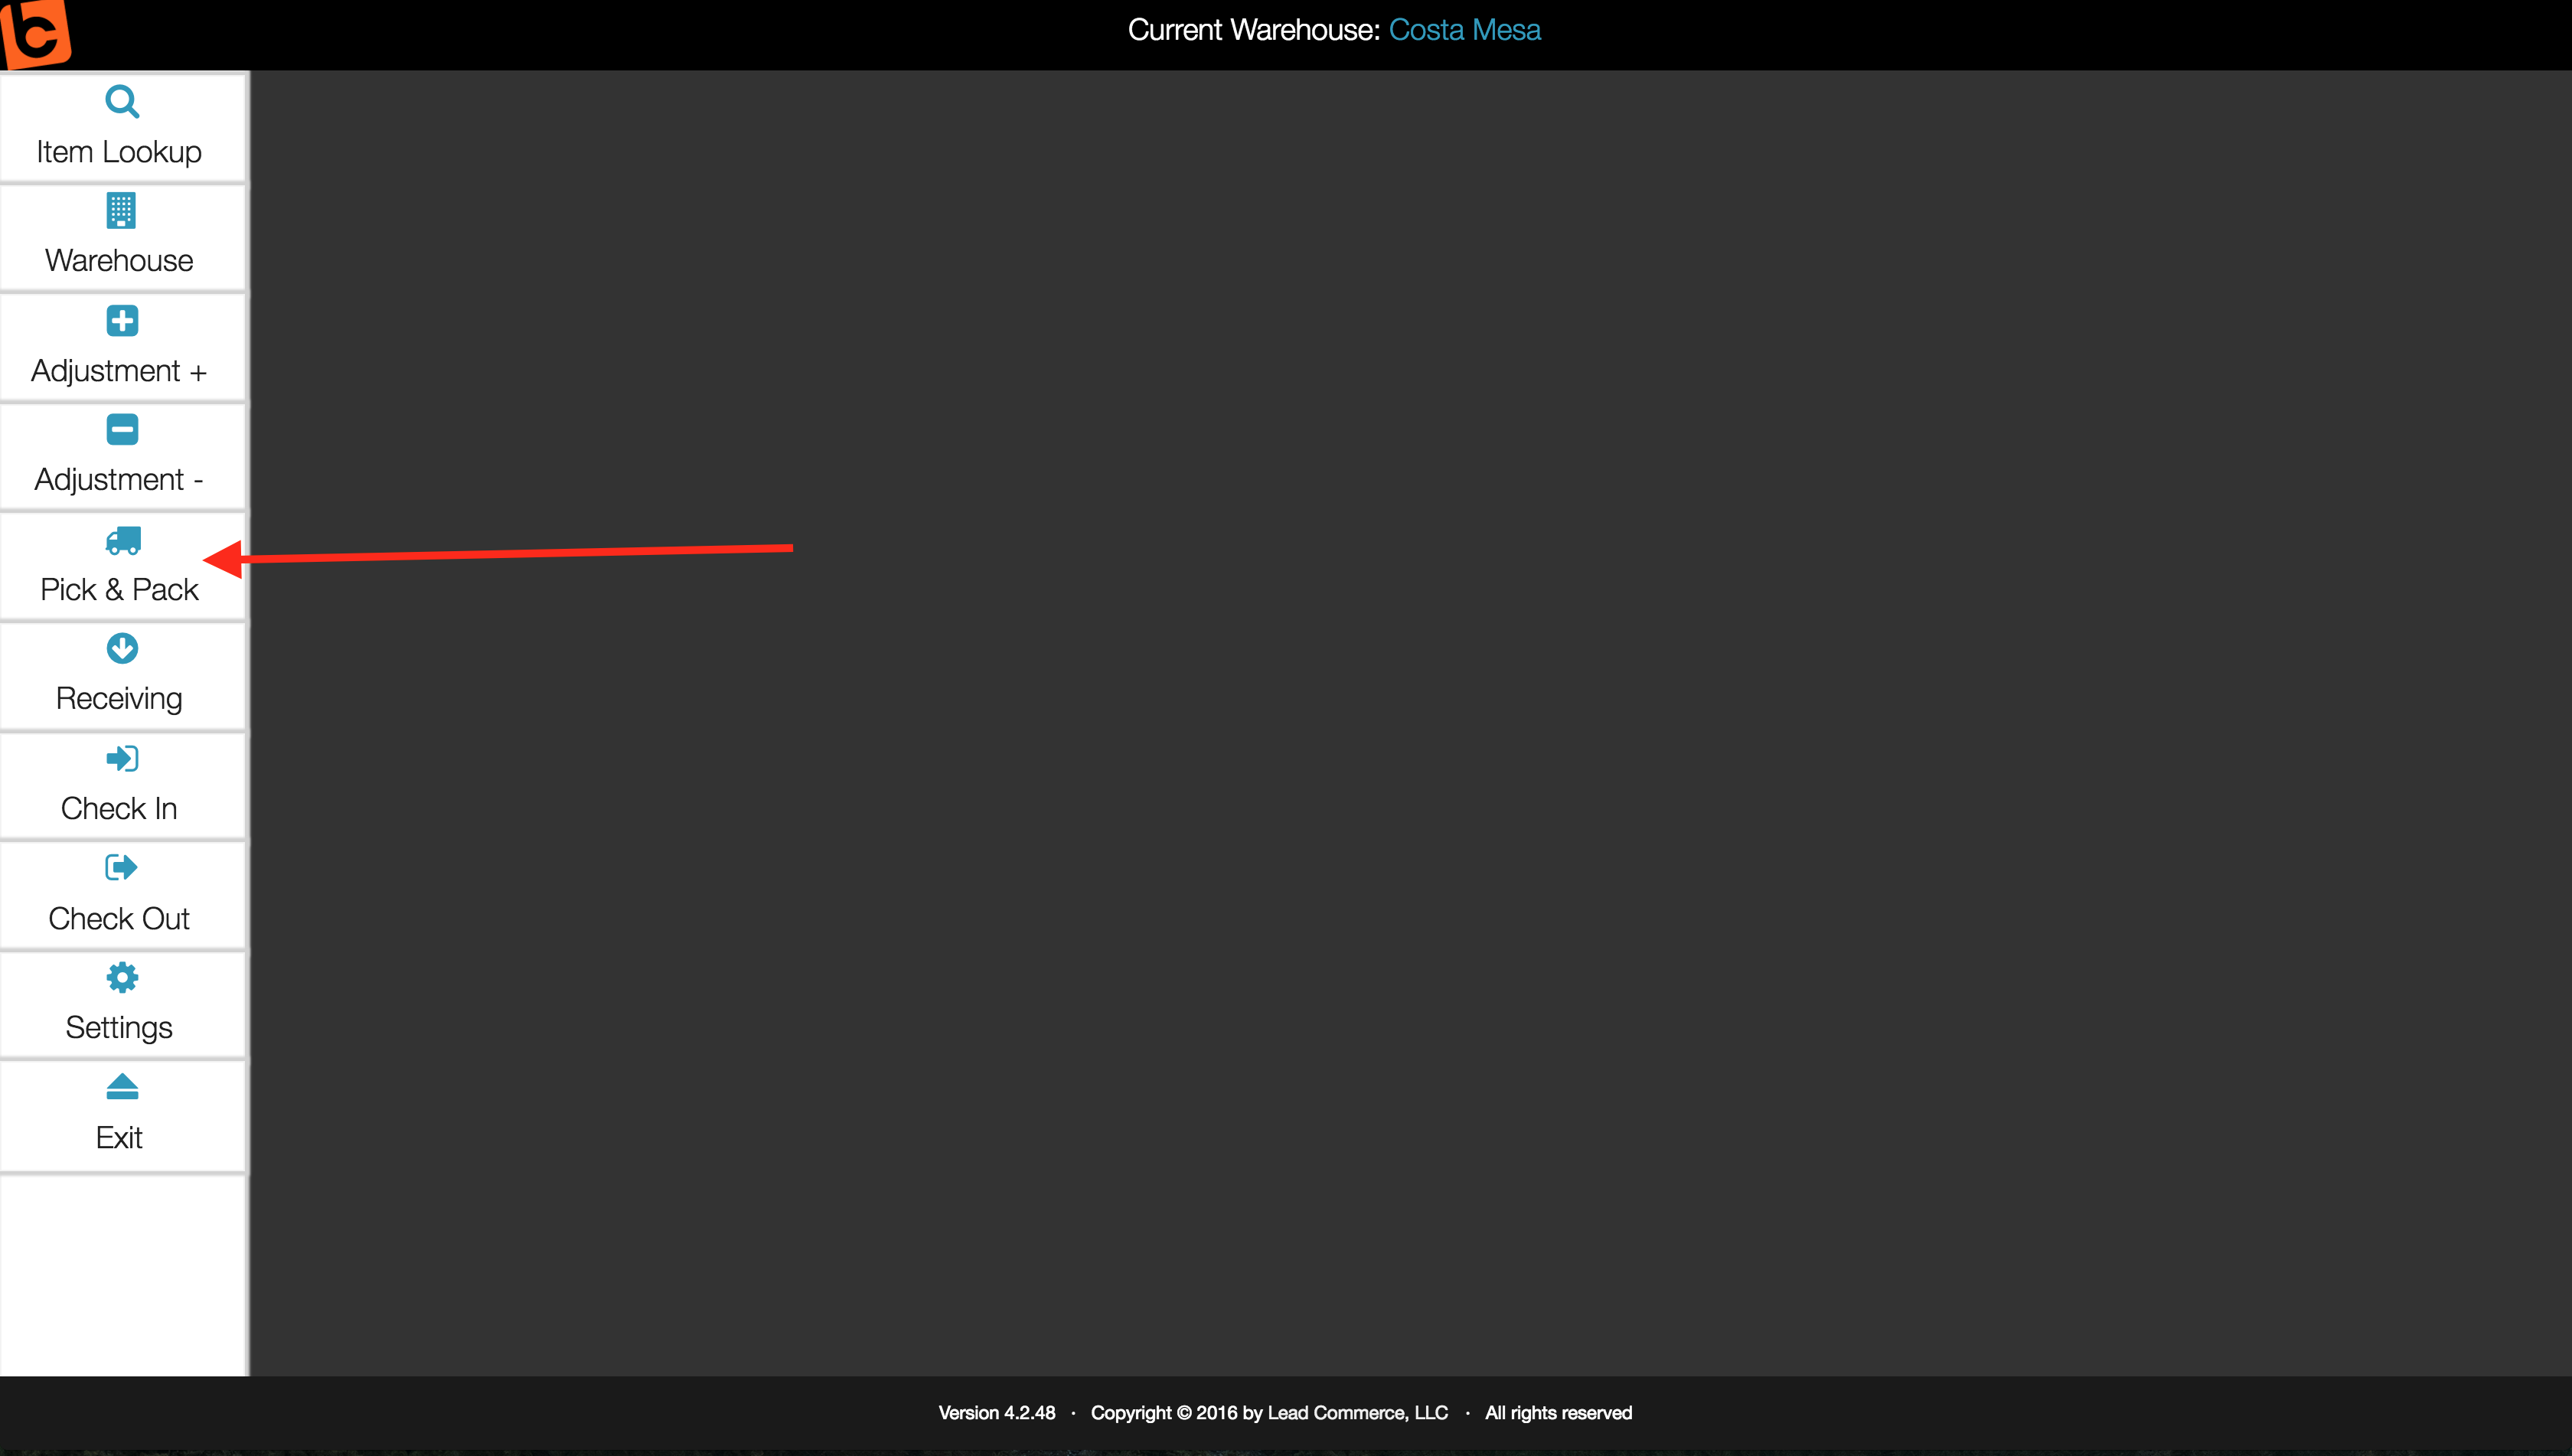
Step 1:
Choose the Pick and Pack option from the main menu of the Barcode Scanner.
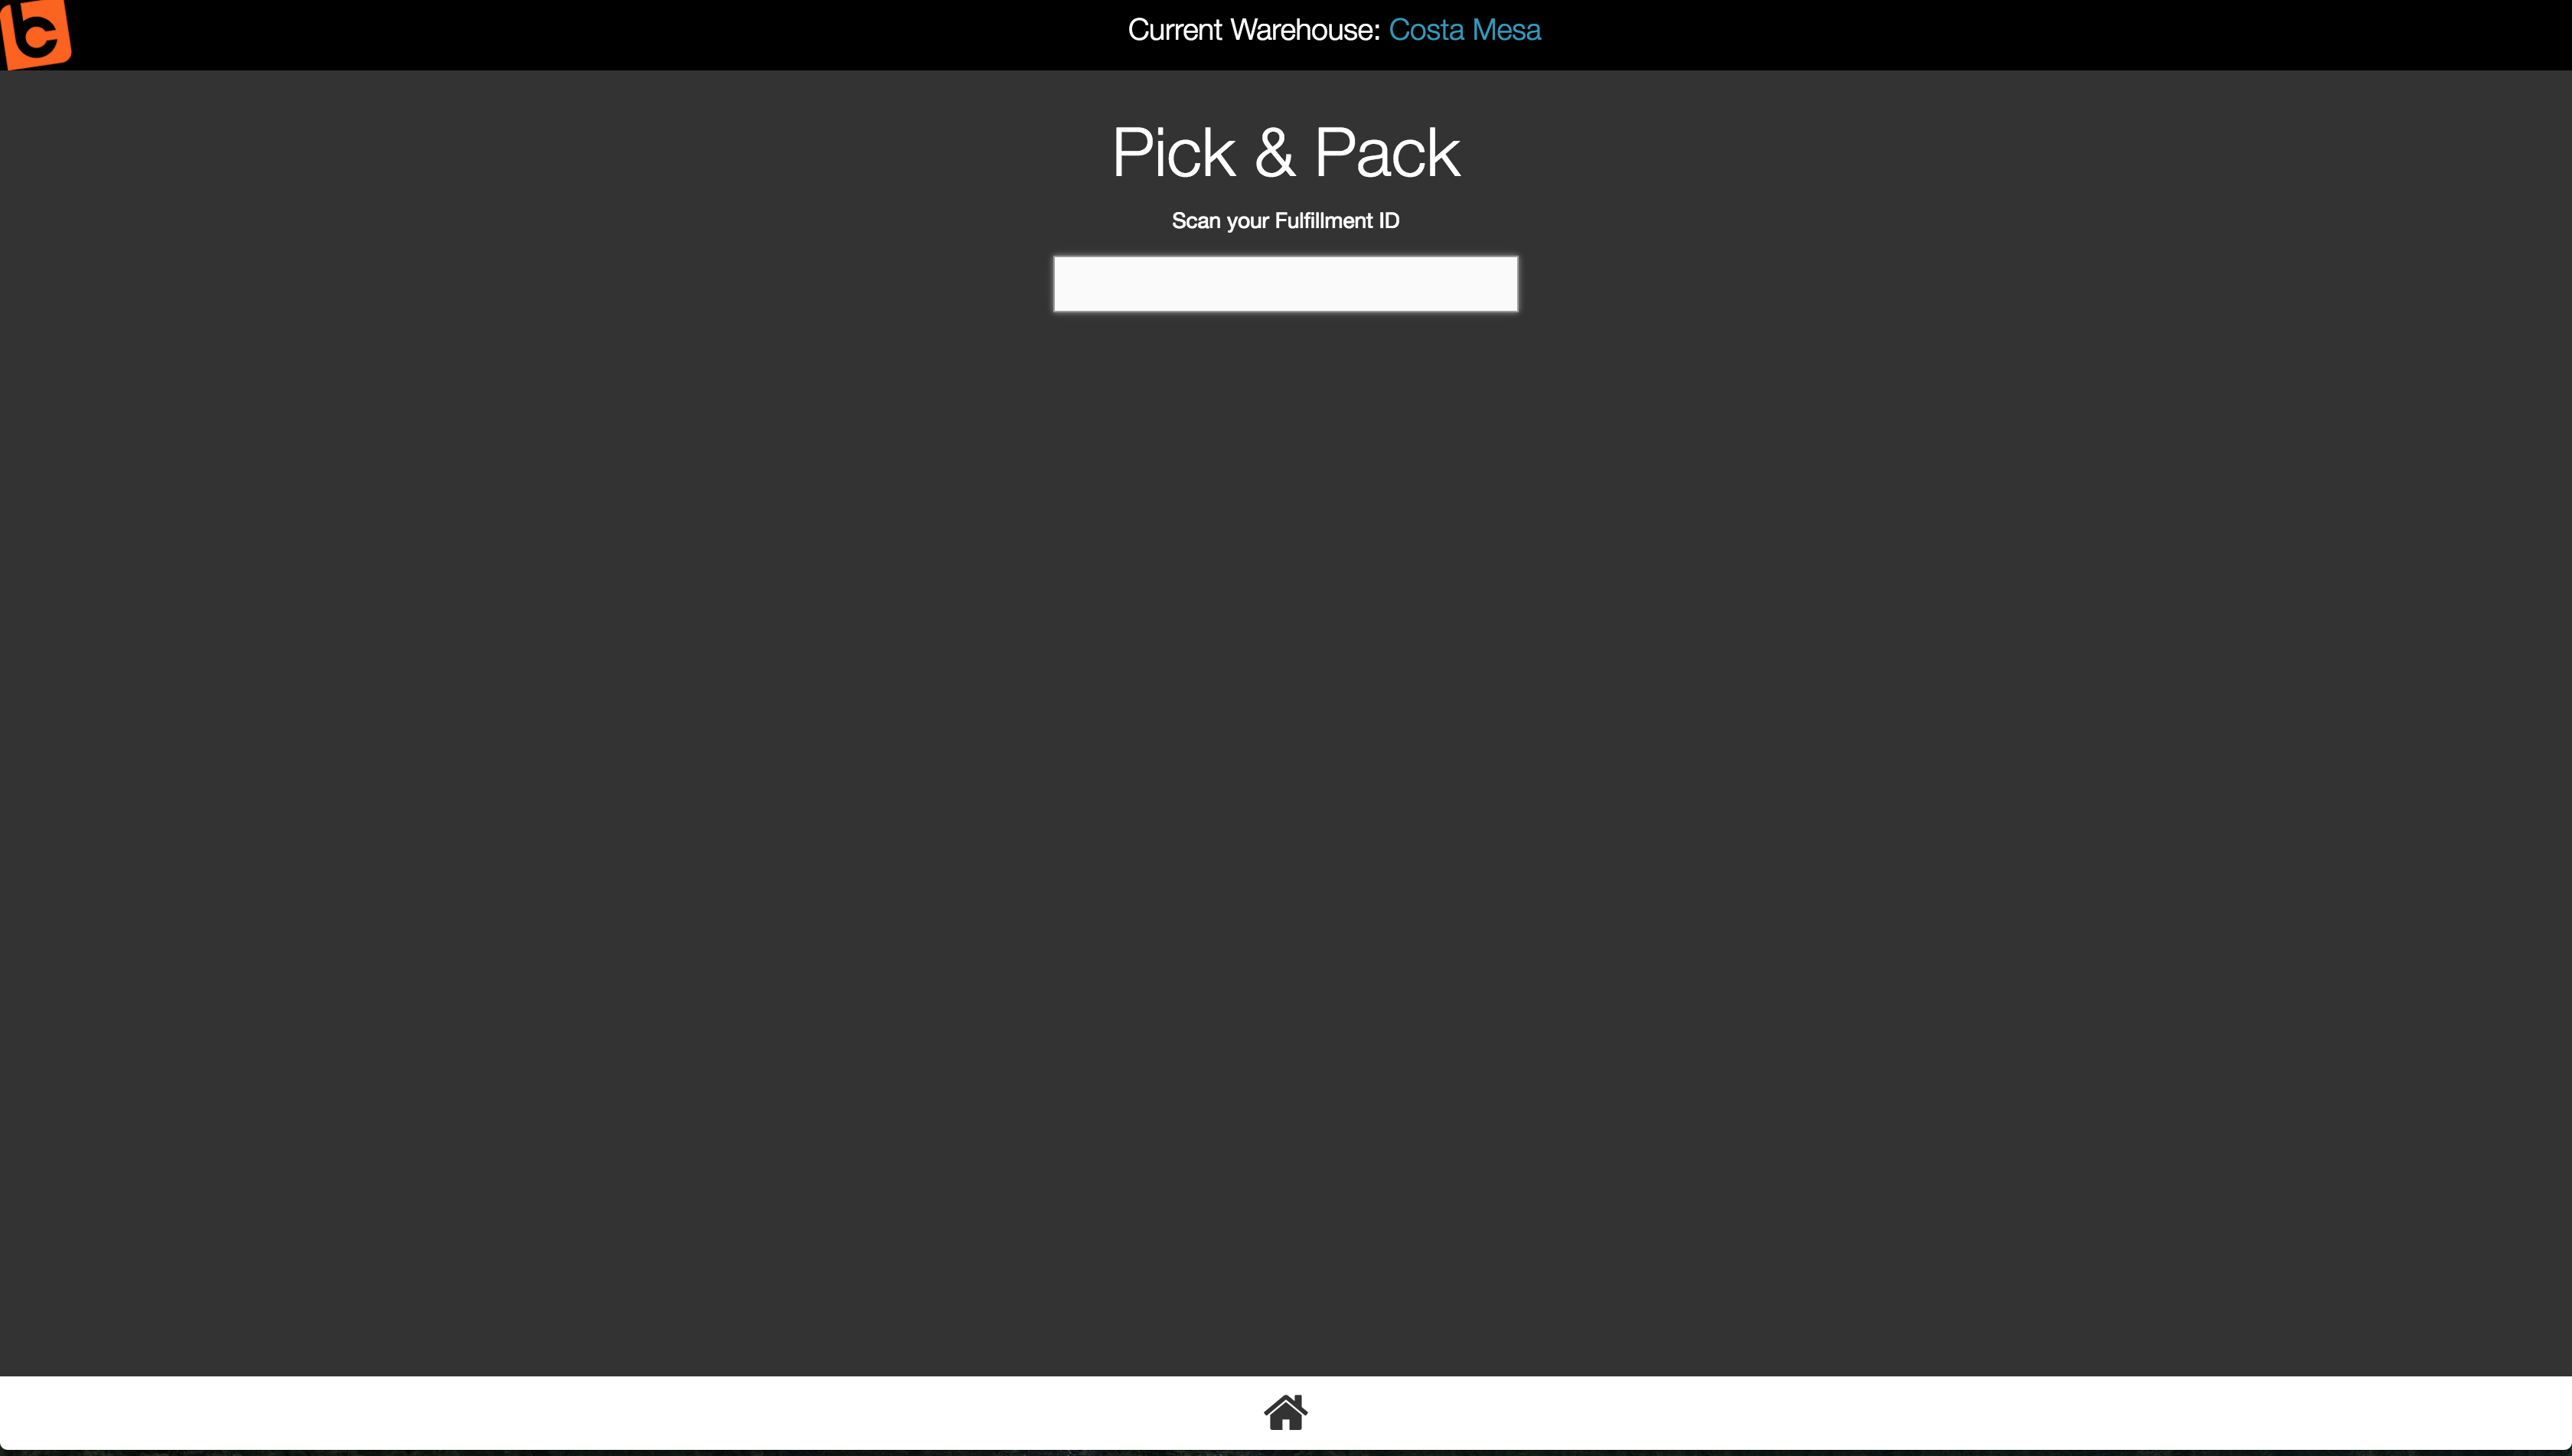
Step 2:
Scan or type in the Fulfillment ID of the packing slip. PLEASE NOTE: If you plan on using this feature, you should consider adding a barcode to your Packing Slip templates. For more information on this, please read this support article on adding barcode tags to templates.
Step 3:
Scan the Packing Slip or enter in the Fulfillment ID number into the field.
Step 4:
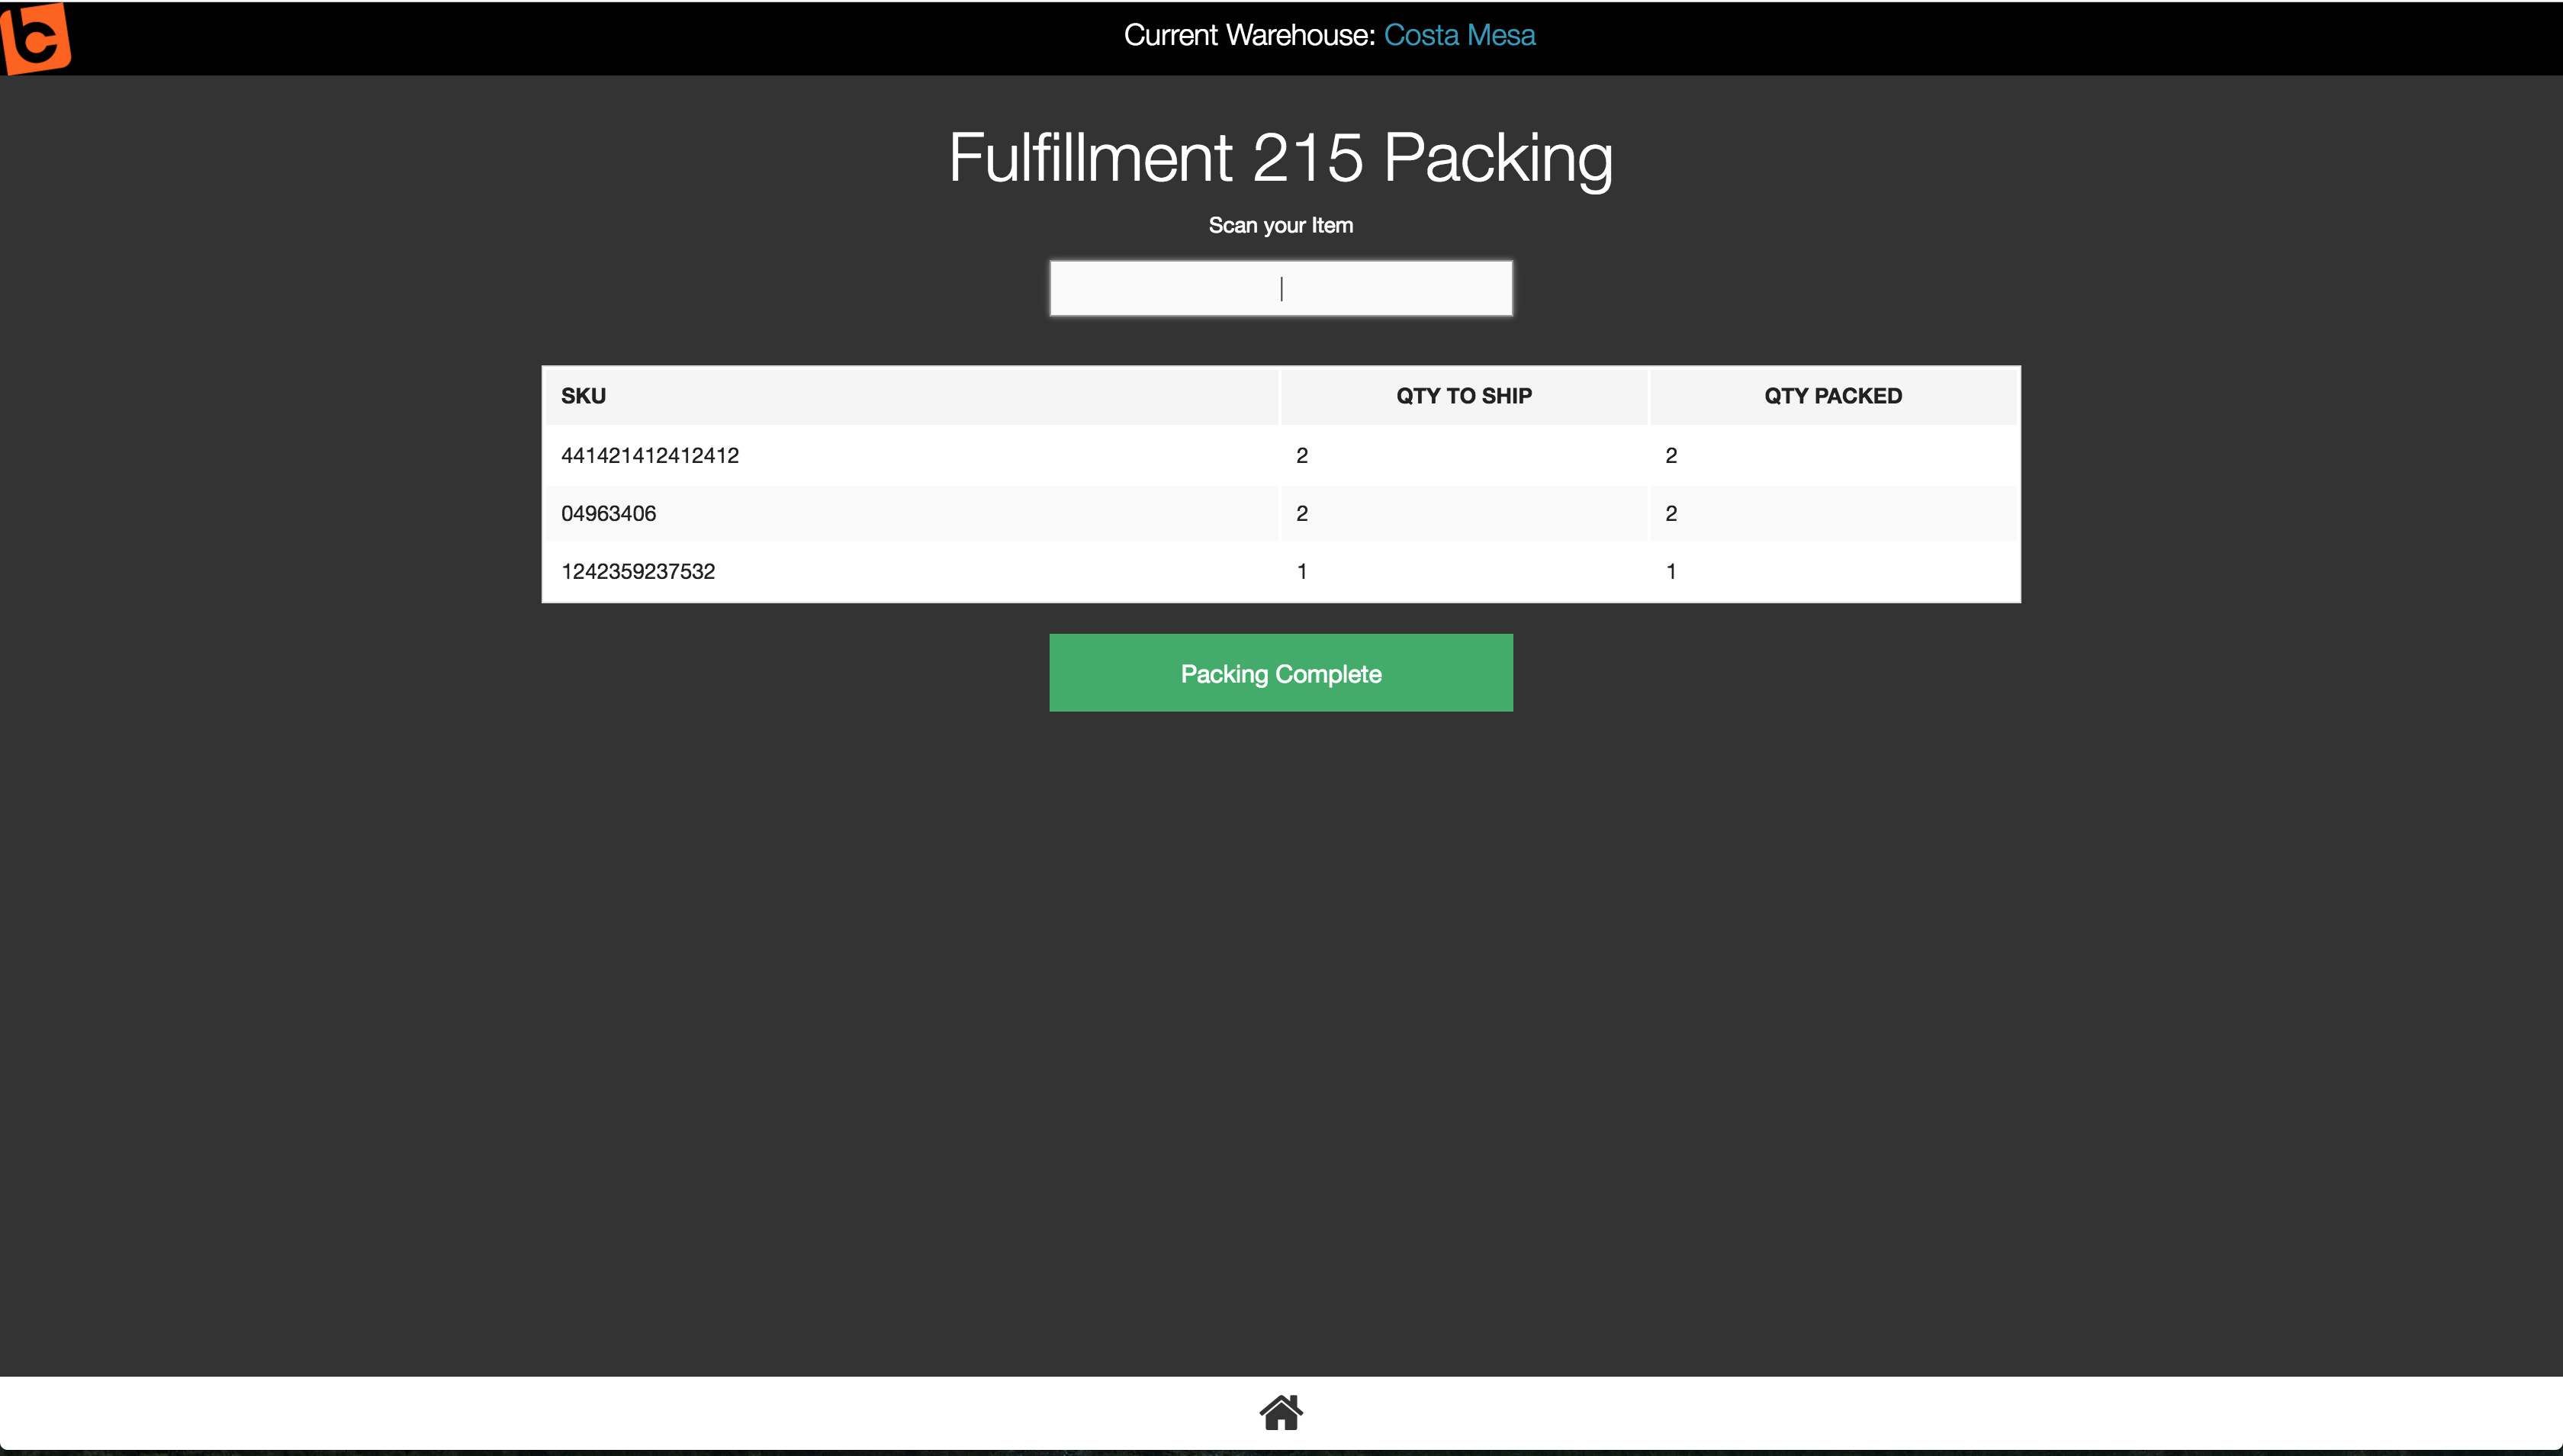
The details of the Fulfillment will display on the screen.
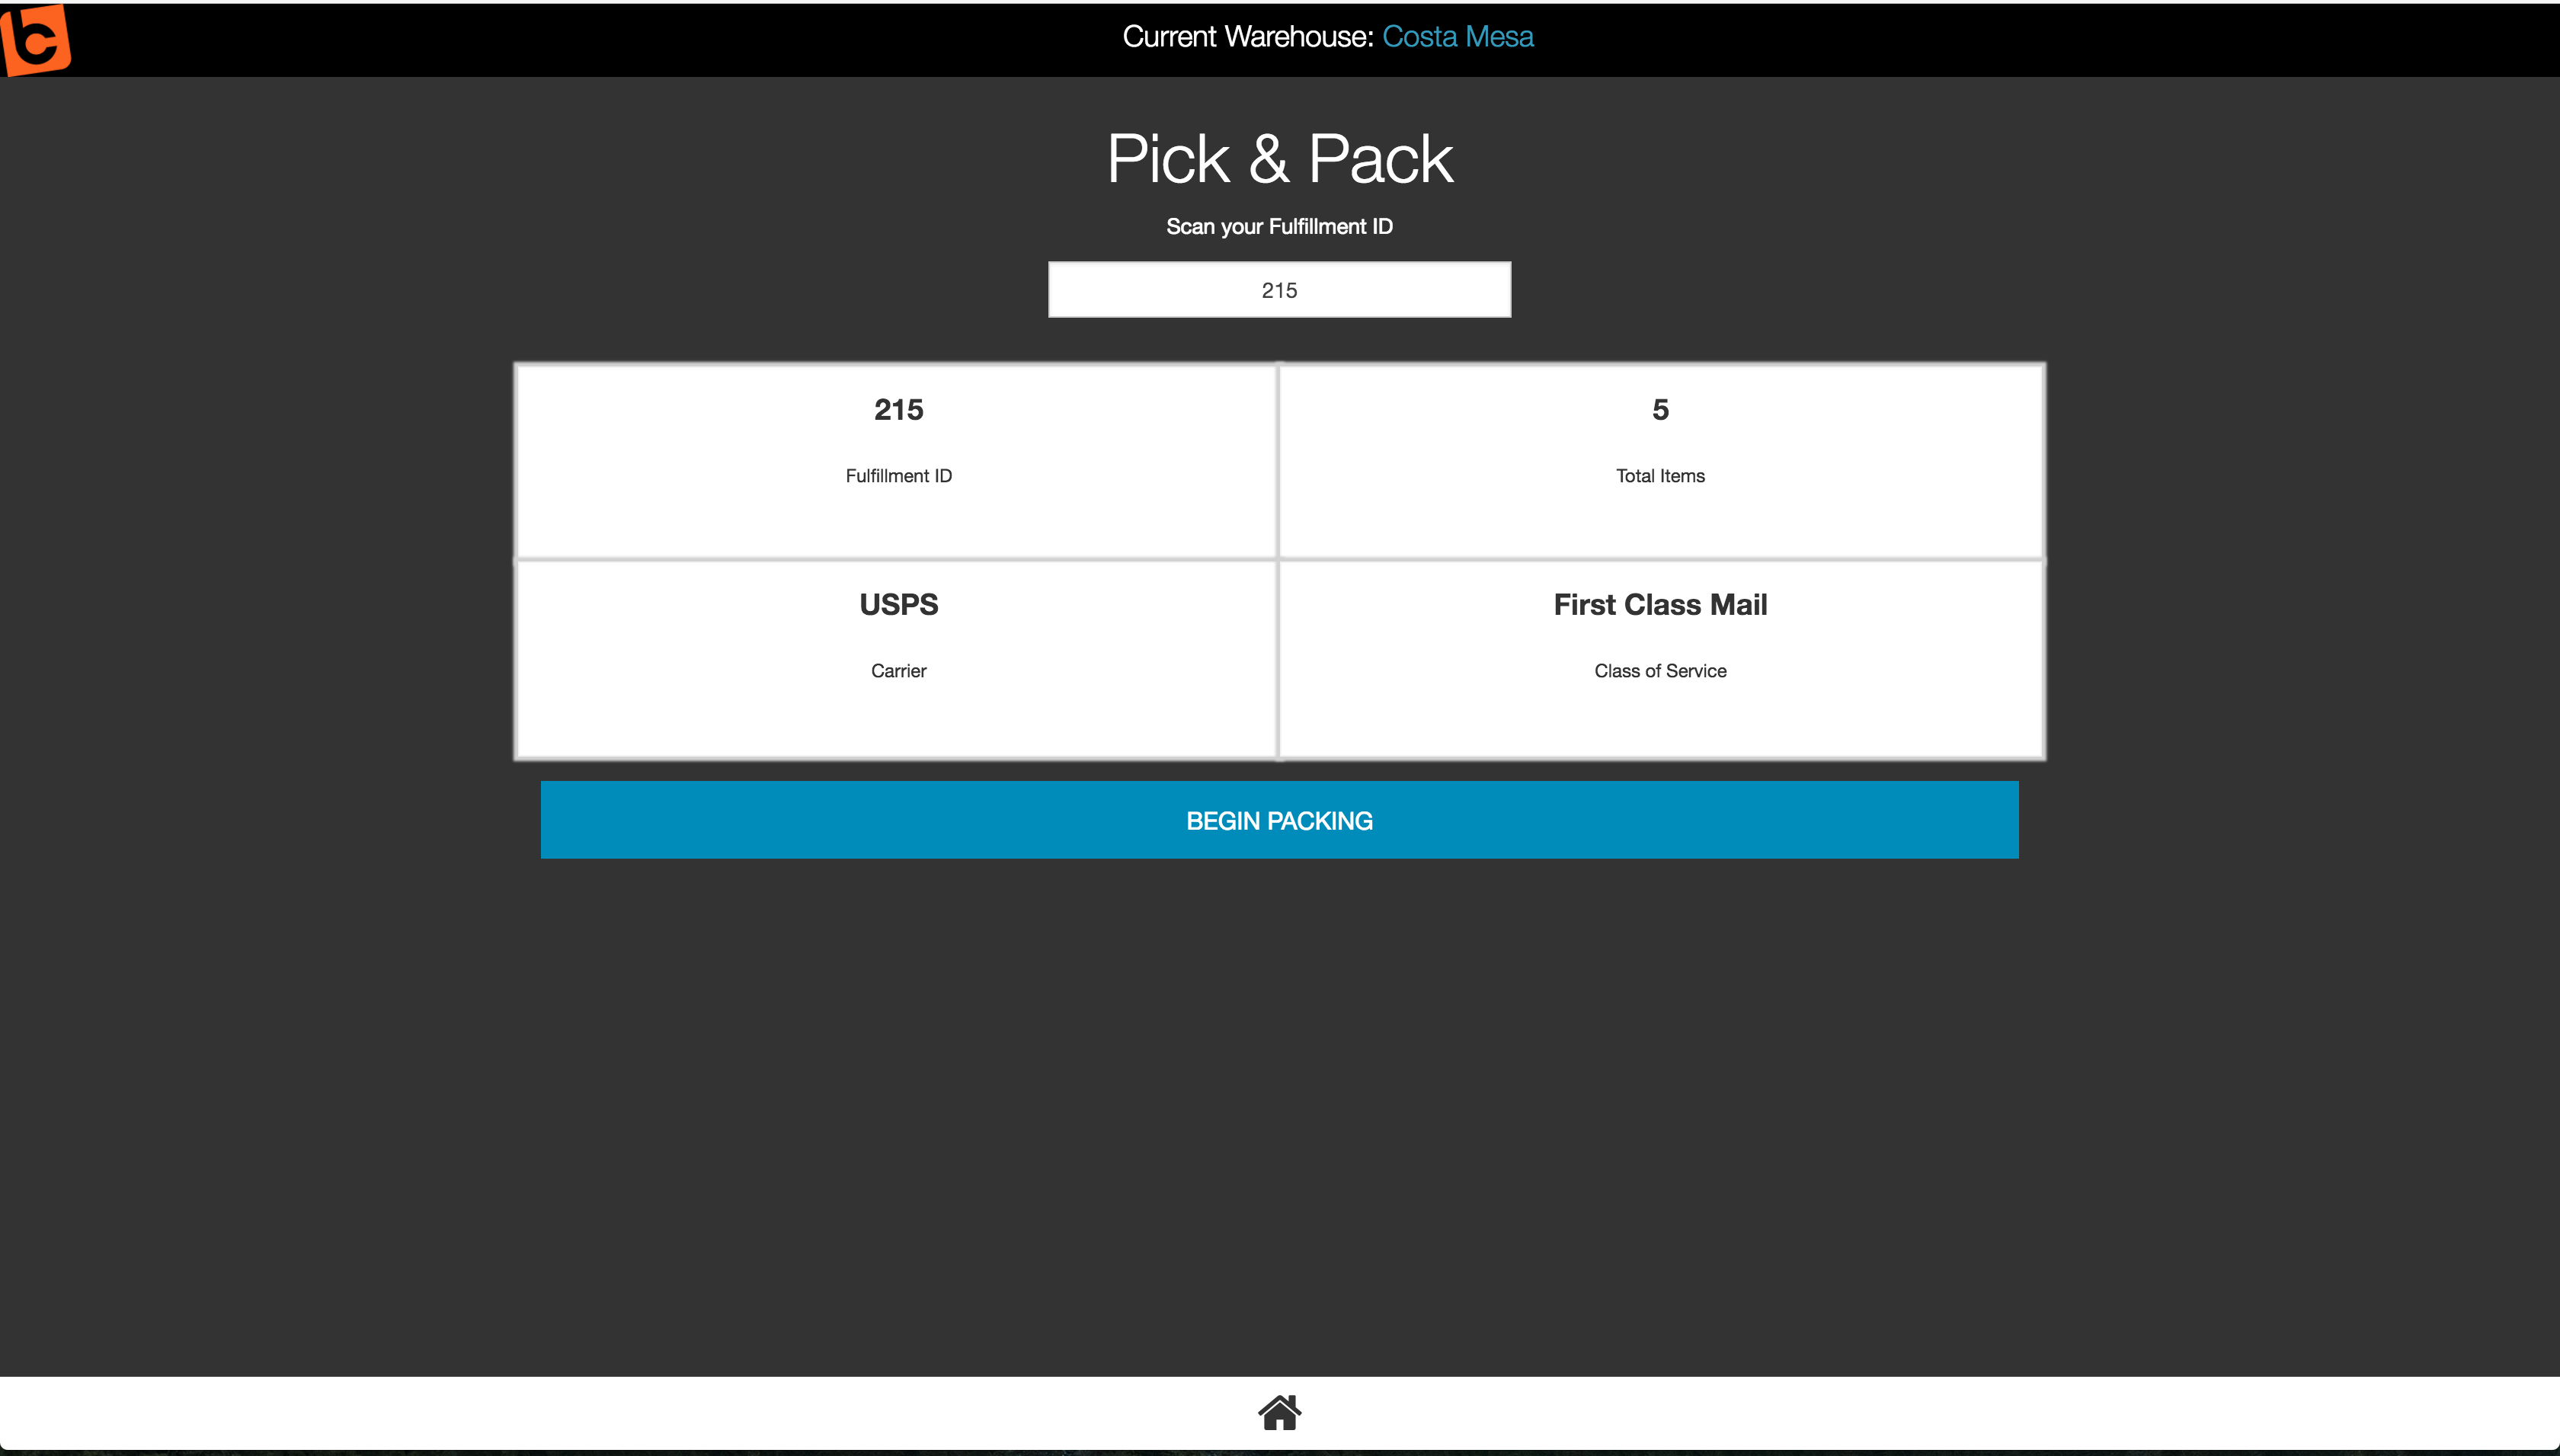
Step 5:
Select the Begin Packing button (blue). The next steps would be to scan the items as you physically put them into the shipping box. This is sometimes referred to as the "sort".
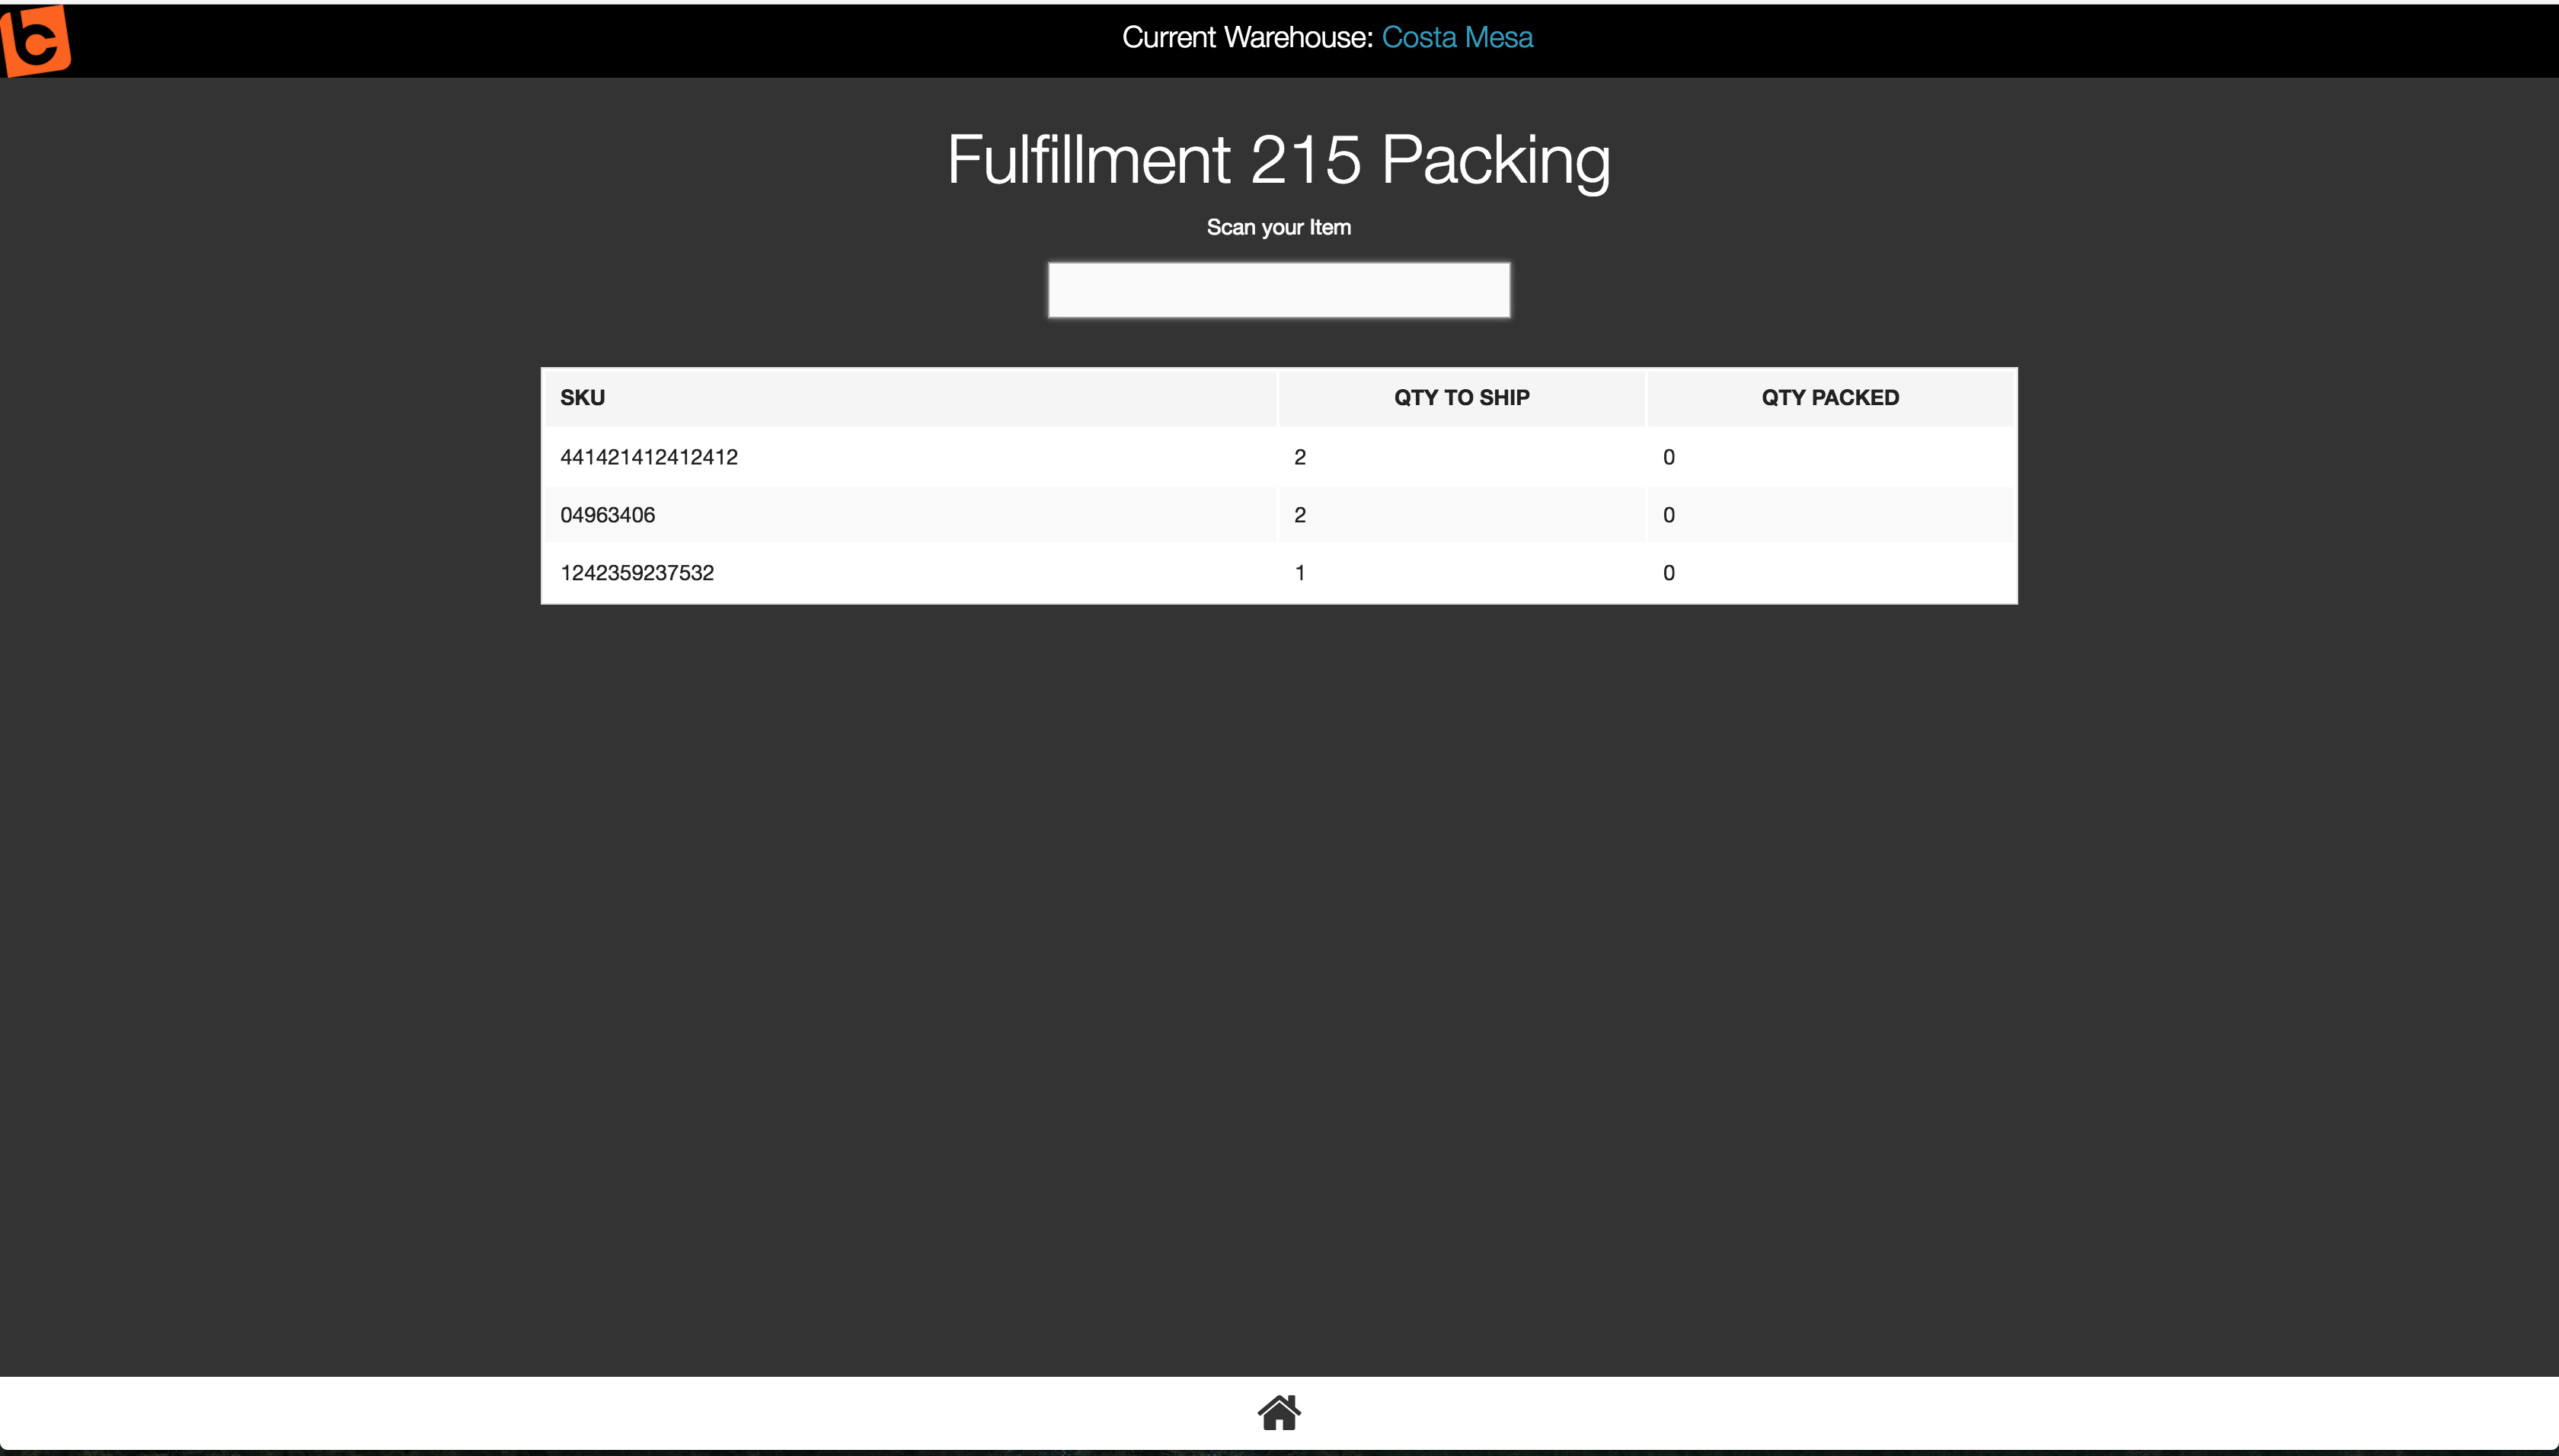
As you scan you will begin to notice that the QTY PACKED column will auto-increment at one unit at a time with each scan.
Step 6:
Click the Packing Complete button once you have scanned all items that need to be in that specific Fulfillment (i.e. shipment or box).

 Made with ❤ in the USA.
